You have signed up on Midjourney to create AI images.
You might have tried to generate an image by giving the /imagine command. You are disappointed to see the results are very generic. There seem to be a lot of customization options and features on Midjourney.
But you have no idea how to use them.
Before you quit Midjourney, let’s give it a final try.
In this blog, we’ll take you through detailed steps on how to use Midjourney to create AI images. And also give you actionable tips to write effective midjourney prompts.
After all this, if you still feel Midjourney is not for you, we have better options too! To know more about them, you must continue reading 😉
How to use Midjourney?
AI can save both time and resources in creating images and visuals for your business. However, a few AI image generators can have a steep learning curve and need guidance to get started.
Midjourney is one such generative AI tool that requires you to take that extra step to create perfect AI images relevant to your business.
So, here is a straightforward guide on how to use Midjourney.
Sign up for Discord
Before you jump straight into Midjourney, you’ll need to be part of its Discord community. Here’s how:
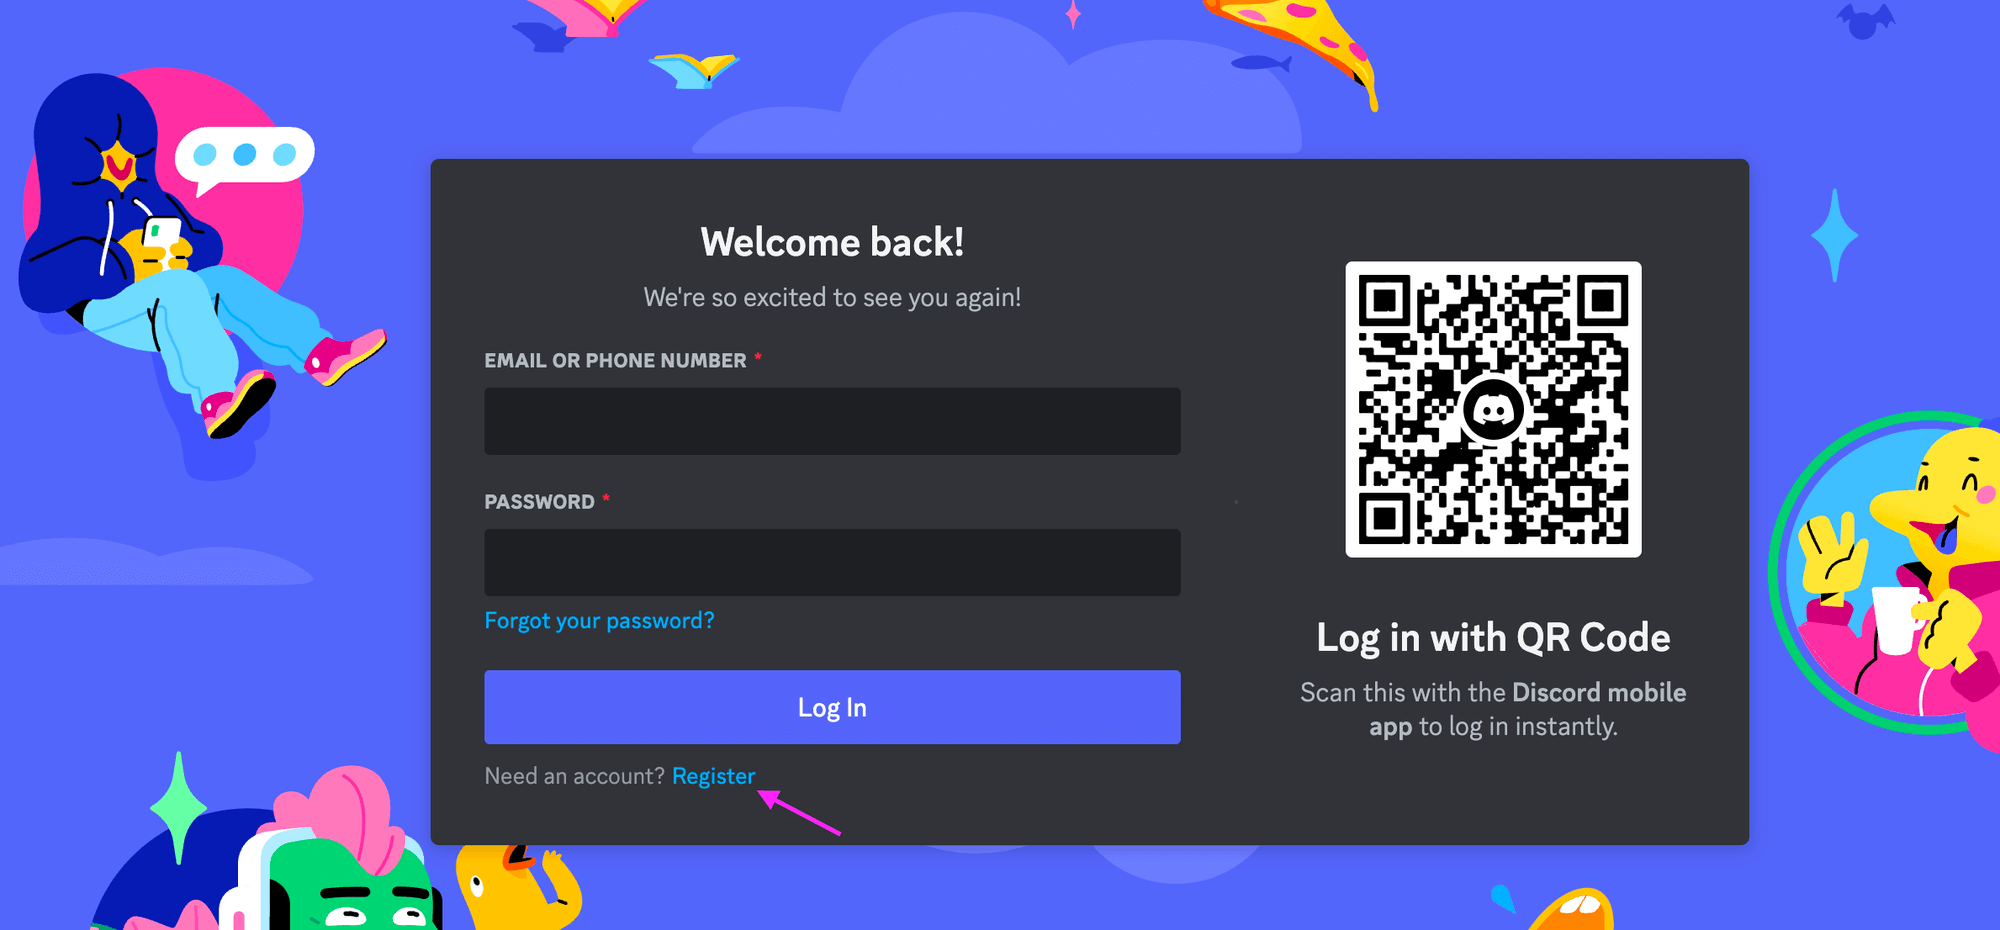
If you aren’t already on Discord, head over to the official Discord website.
Click on ‘Register’ and fill in your details.
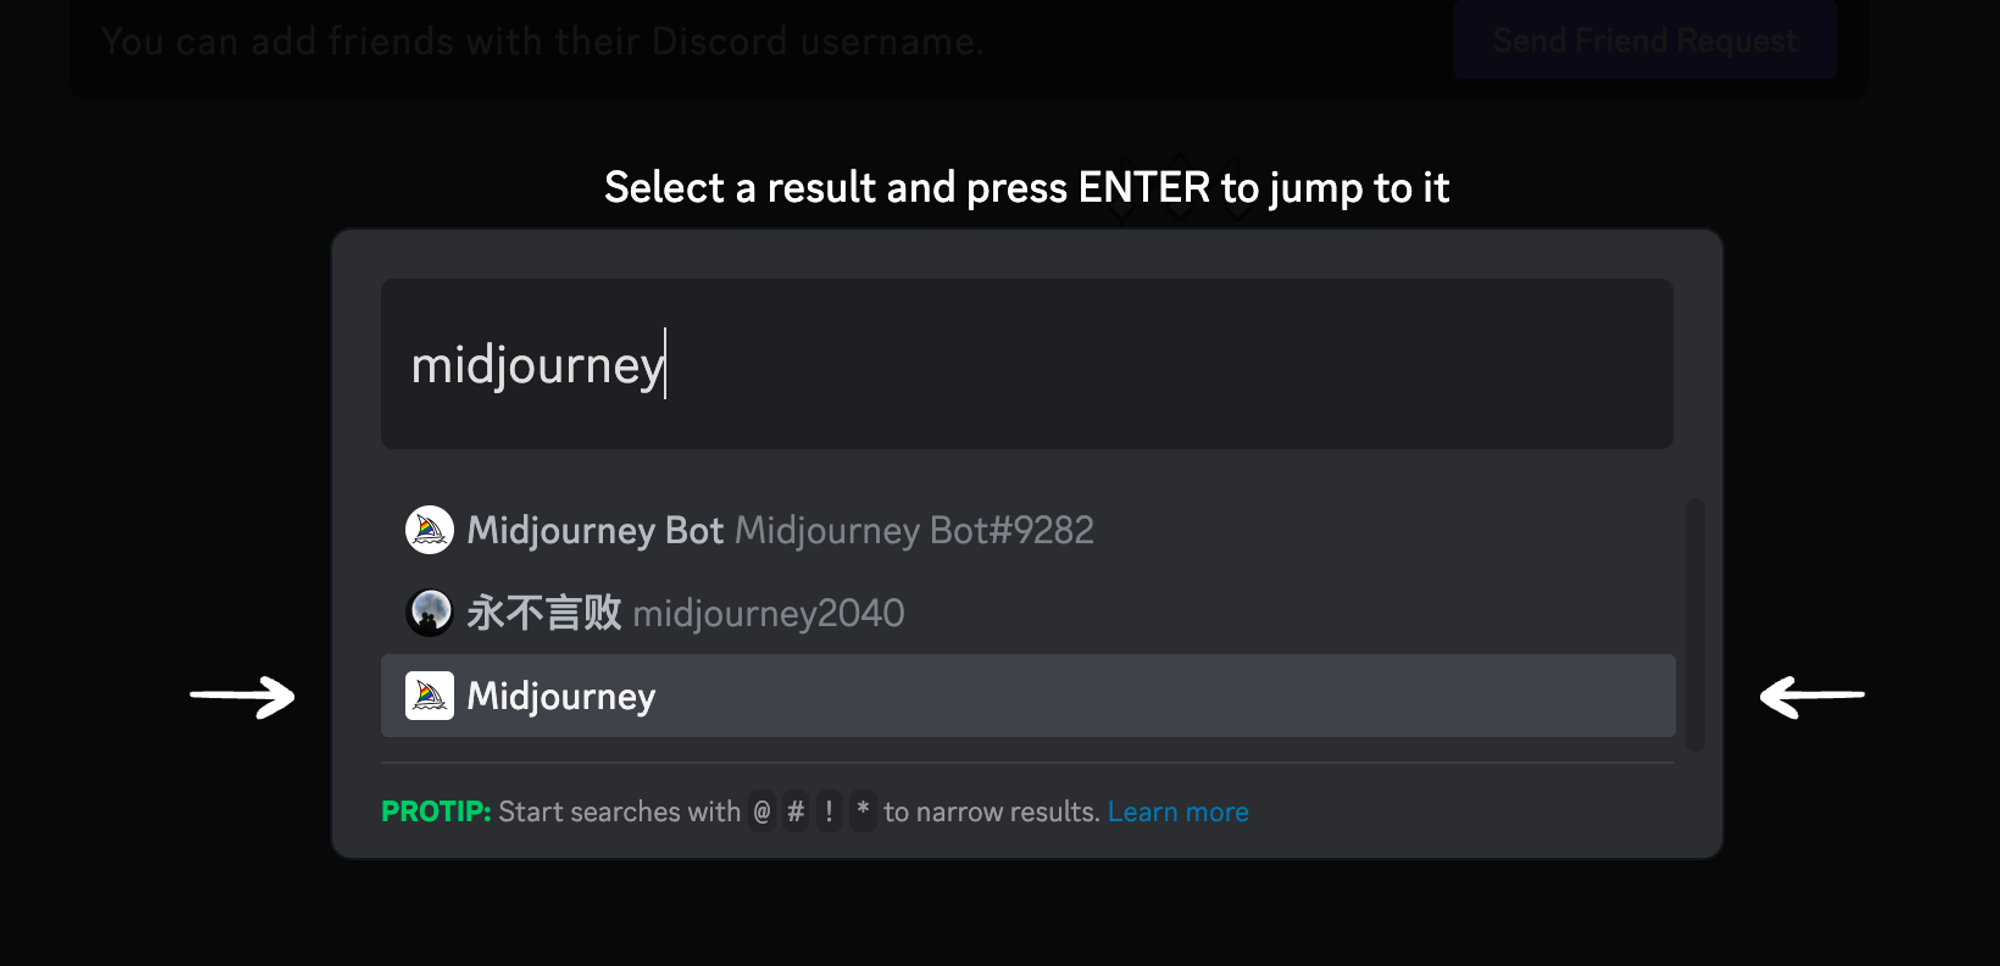
Once you’re in, search for the “Midjourney” community and join. This community will be your hub for everything related to Midjourney, from updates to support.
Sign up for Midjourney
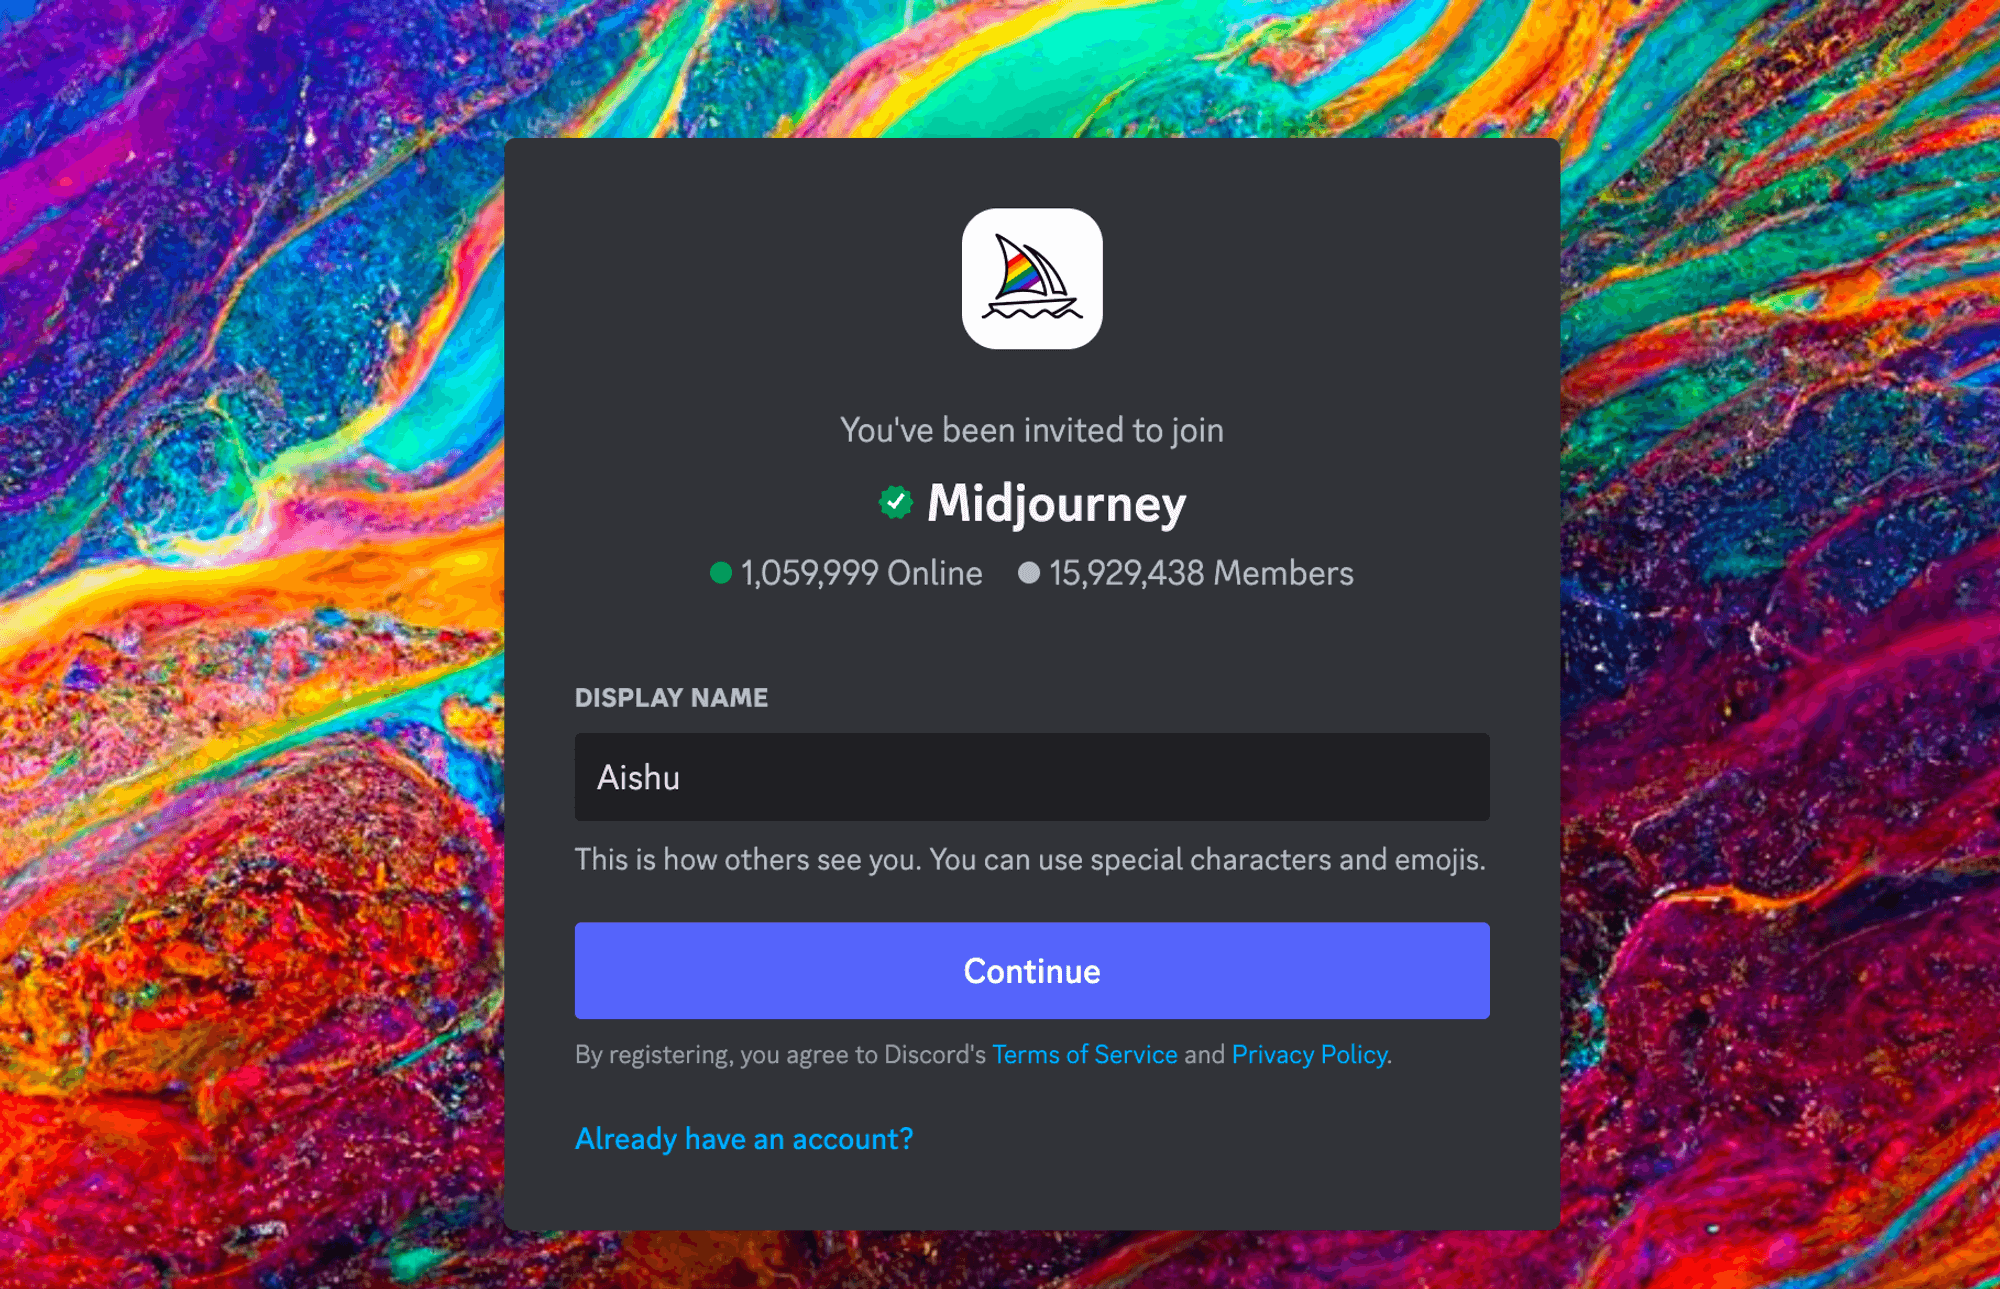
Now, go to the Midjourney website and look for the ‘Join the beta’ button. A pop-up will appear asking for a display name. Click on ‘continue.’
Fill in the details like email address and password to complete the sign-up process.
Choose a Midjourney plan
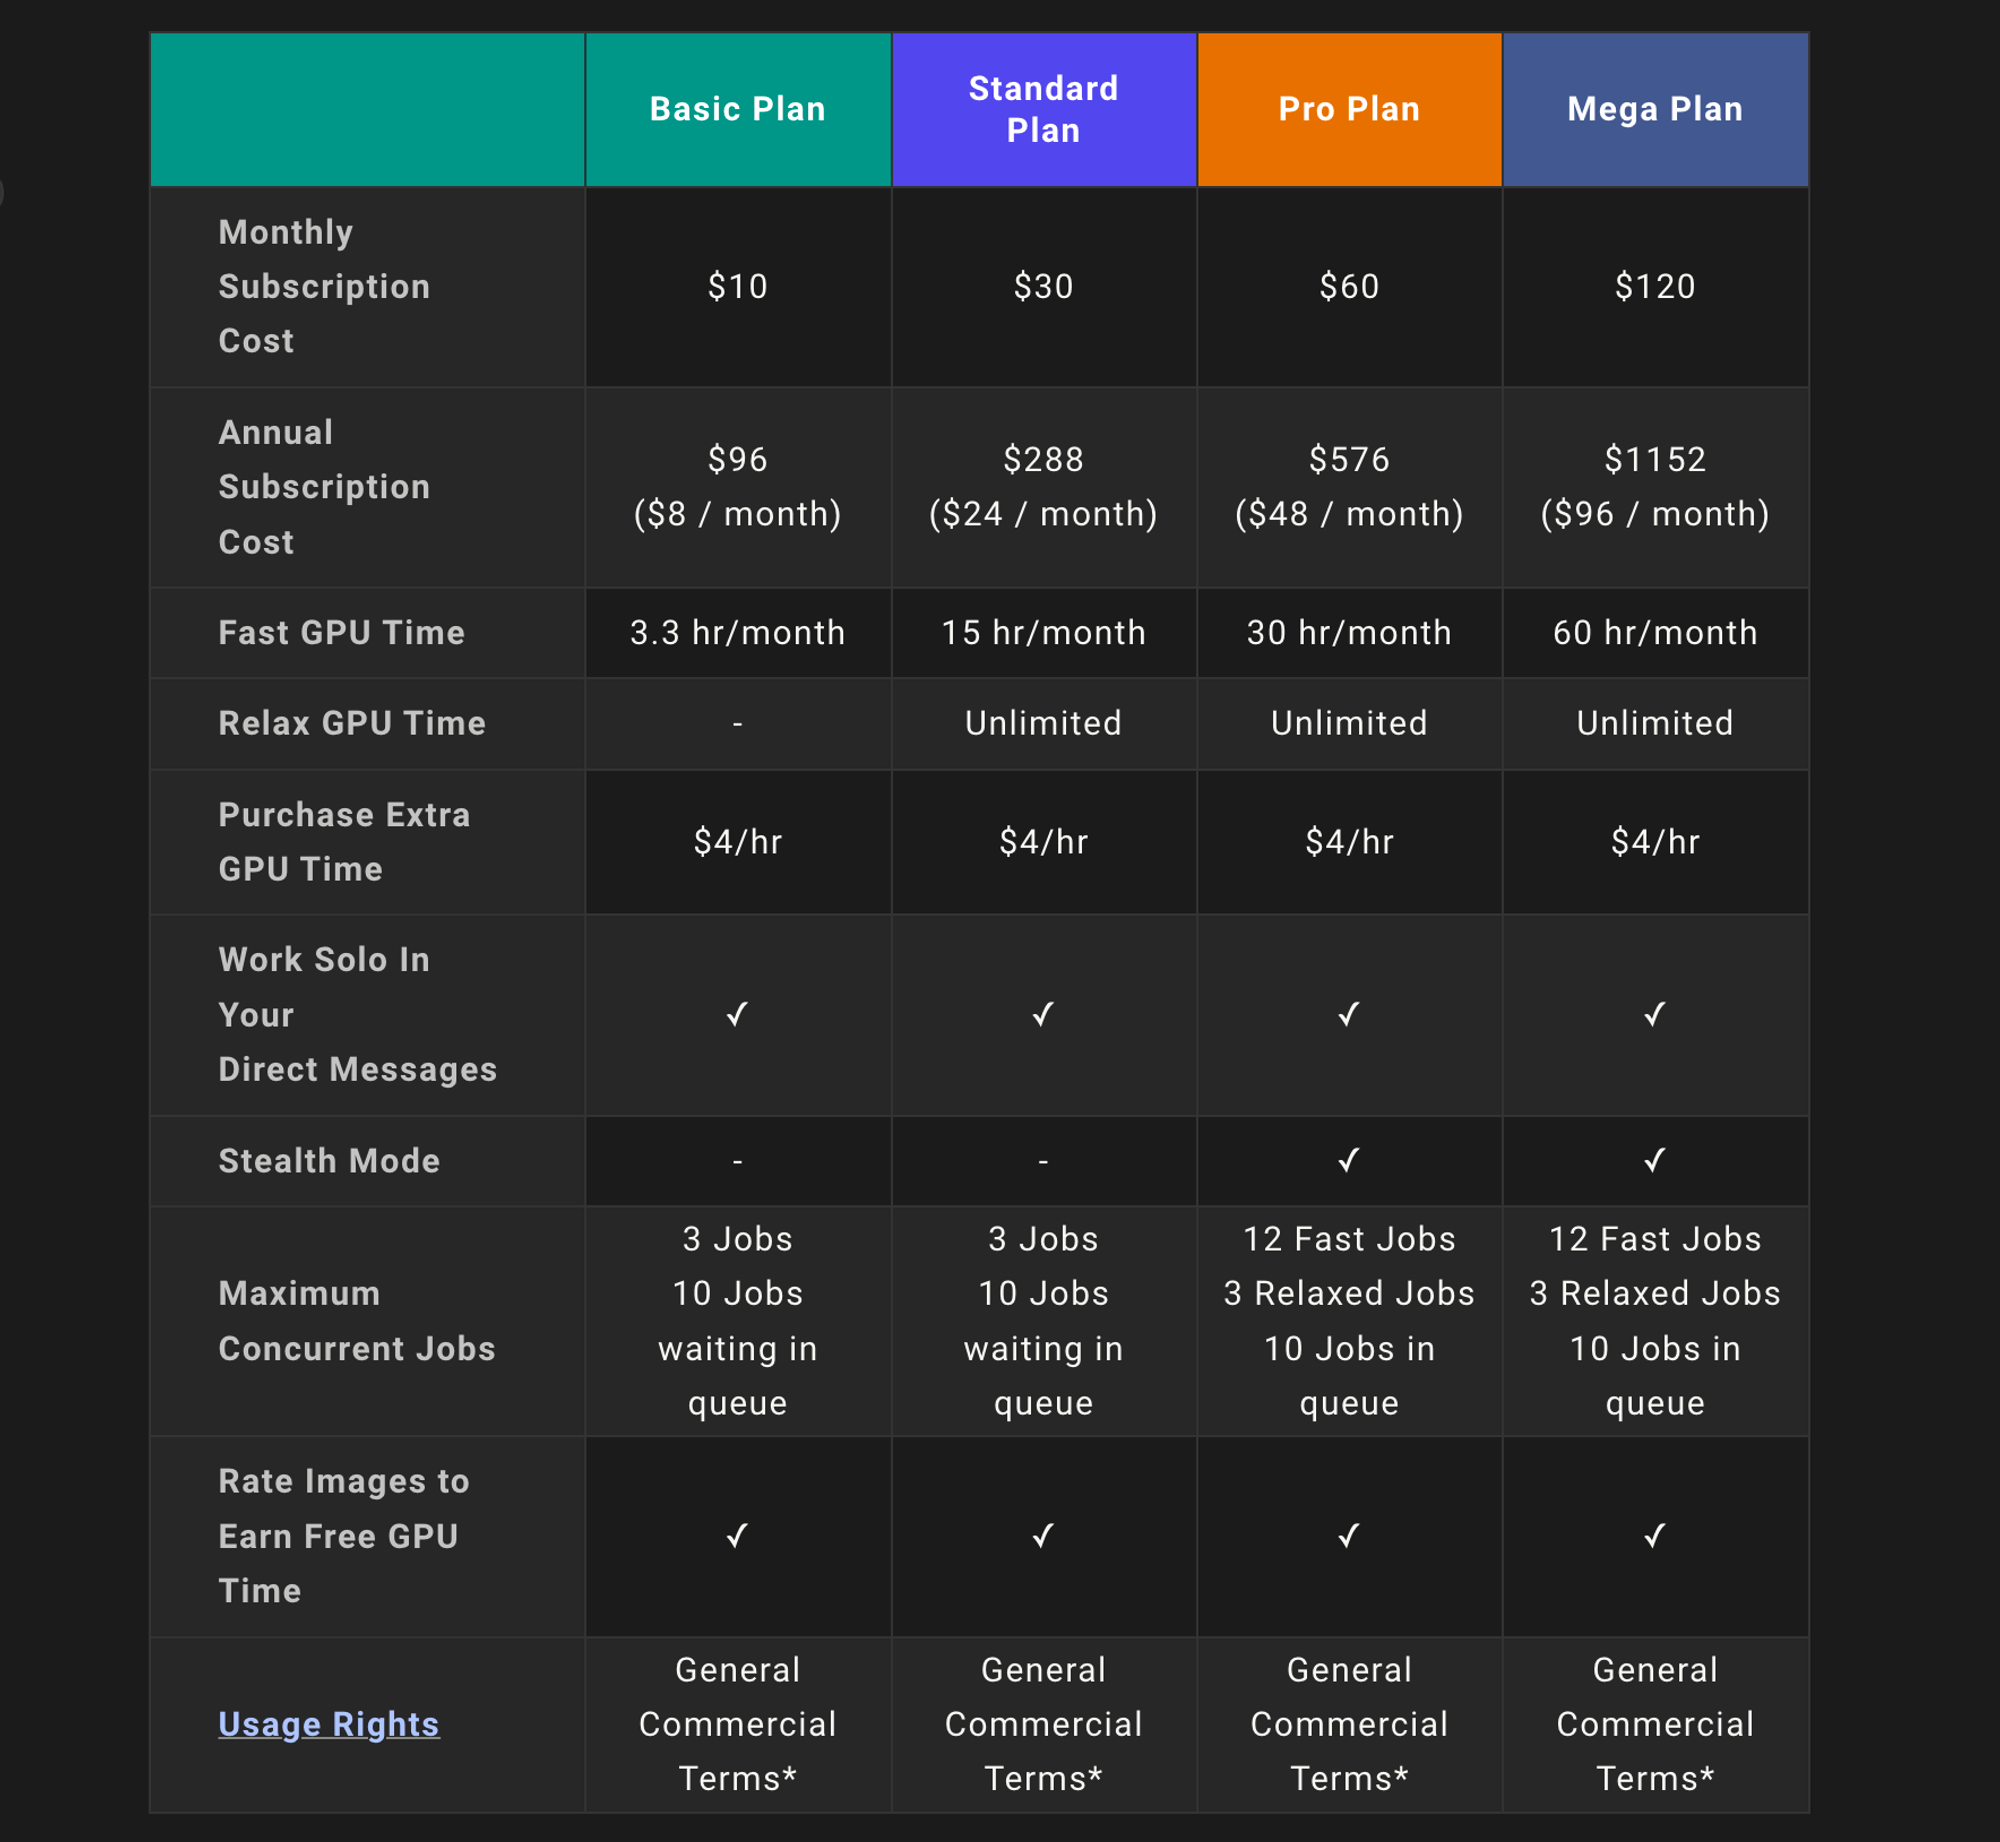
As Midjourney no longer offers a free trial from March 2023, you need to subscribe to a paid plan to start generating AI images.
It has three subscription plans, starting from $10/ month. You can also get a 20% discount if you opt for annual plans.
All Midjourney plans include a Midjourney member gallery, the official Discord, general commercial usage terms, and more.
To subscribe to any plan, use the /subscribe command to generate a personal link to the subscription page.
Looking for a low-cost alternative to midjourney, try Photosonic.
How to create an AI image on Midjourney?
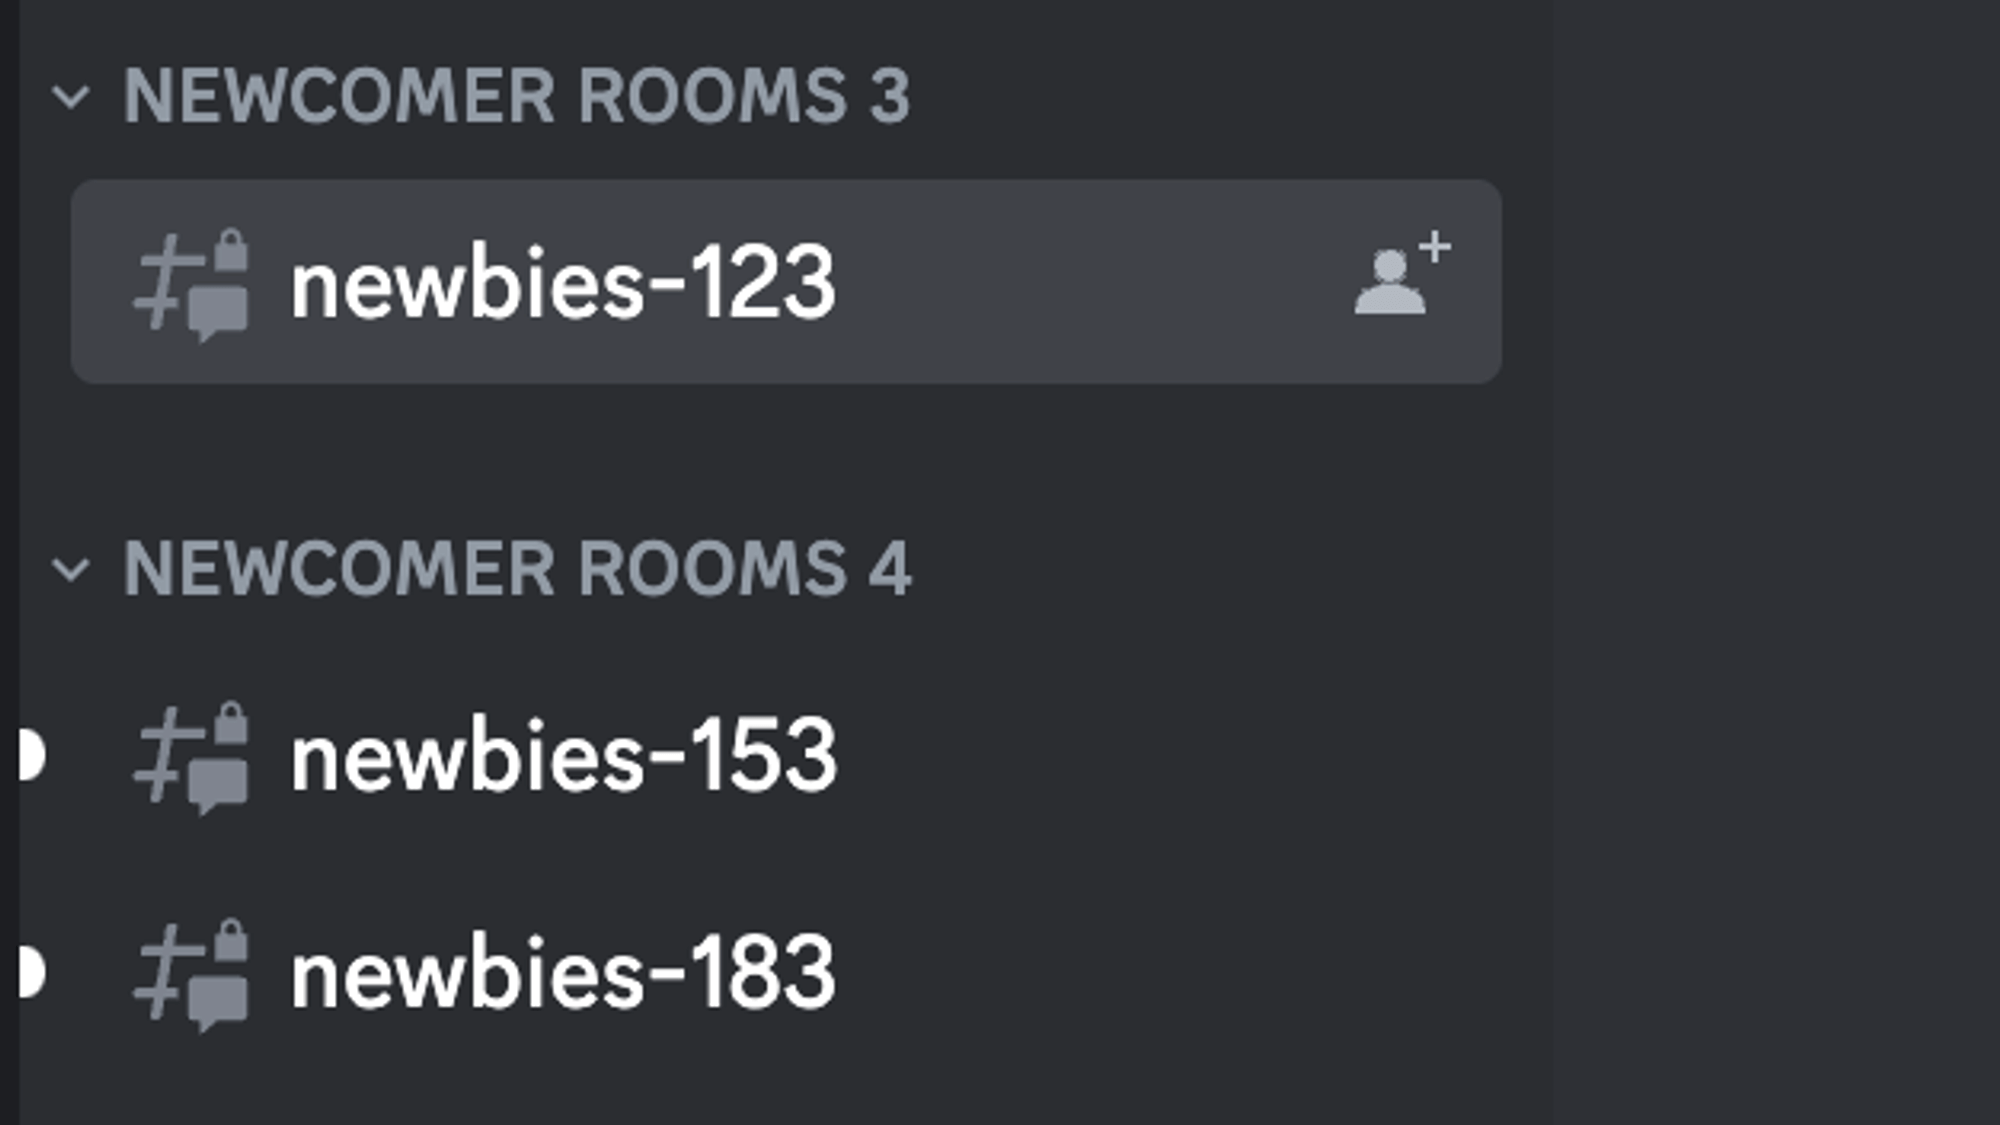
In the discord community, join any newbies channel to create AI images.
Start by using the /imagine command and continue with the prompt.
These newbie channels are generally very crowded, and finding the generated AI image for your prompt can be difficult.
Instead of wasting time scrolling through hundreds of images, you can directly send the prompt to the Midjourney bot.
💡
If you generate an image for the first time on Midjourney, it will ask you to accept Terms of Service (ToS). Click on it.
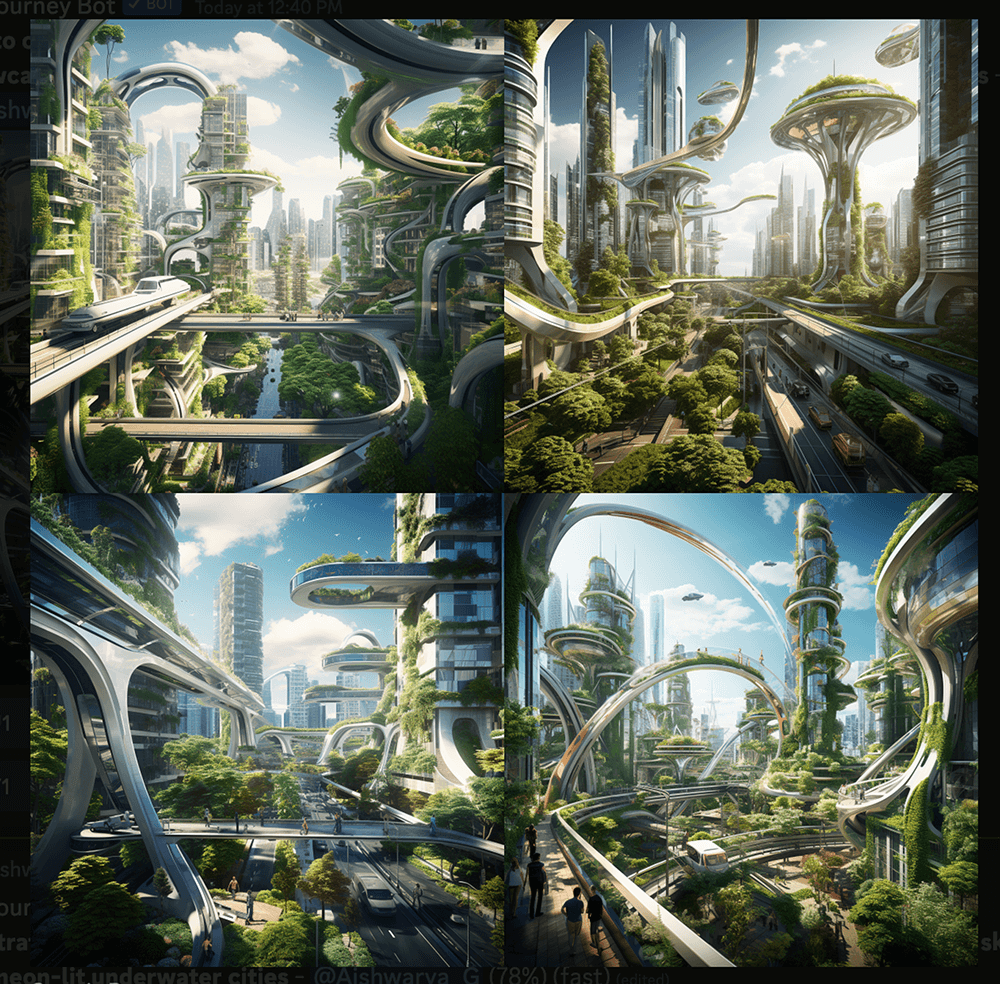
Midjourney generates four variations of AI images in less than 60 seconds.
The 1 in U1 and V1 refers to the first image of the grid. ‘U’ means upscale and ‘V’ means vary.
We’ll learn about upscaling and varying in the next section.
Edit and Refine AI images
Generating an AI image is not the end of the story. Midjourney offers various options to edit and refine your AI images to the minute detail.
Let’s start with the basic editing features that you can see below the generated image.
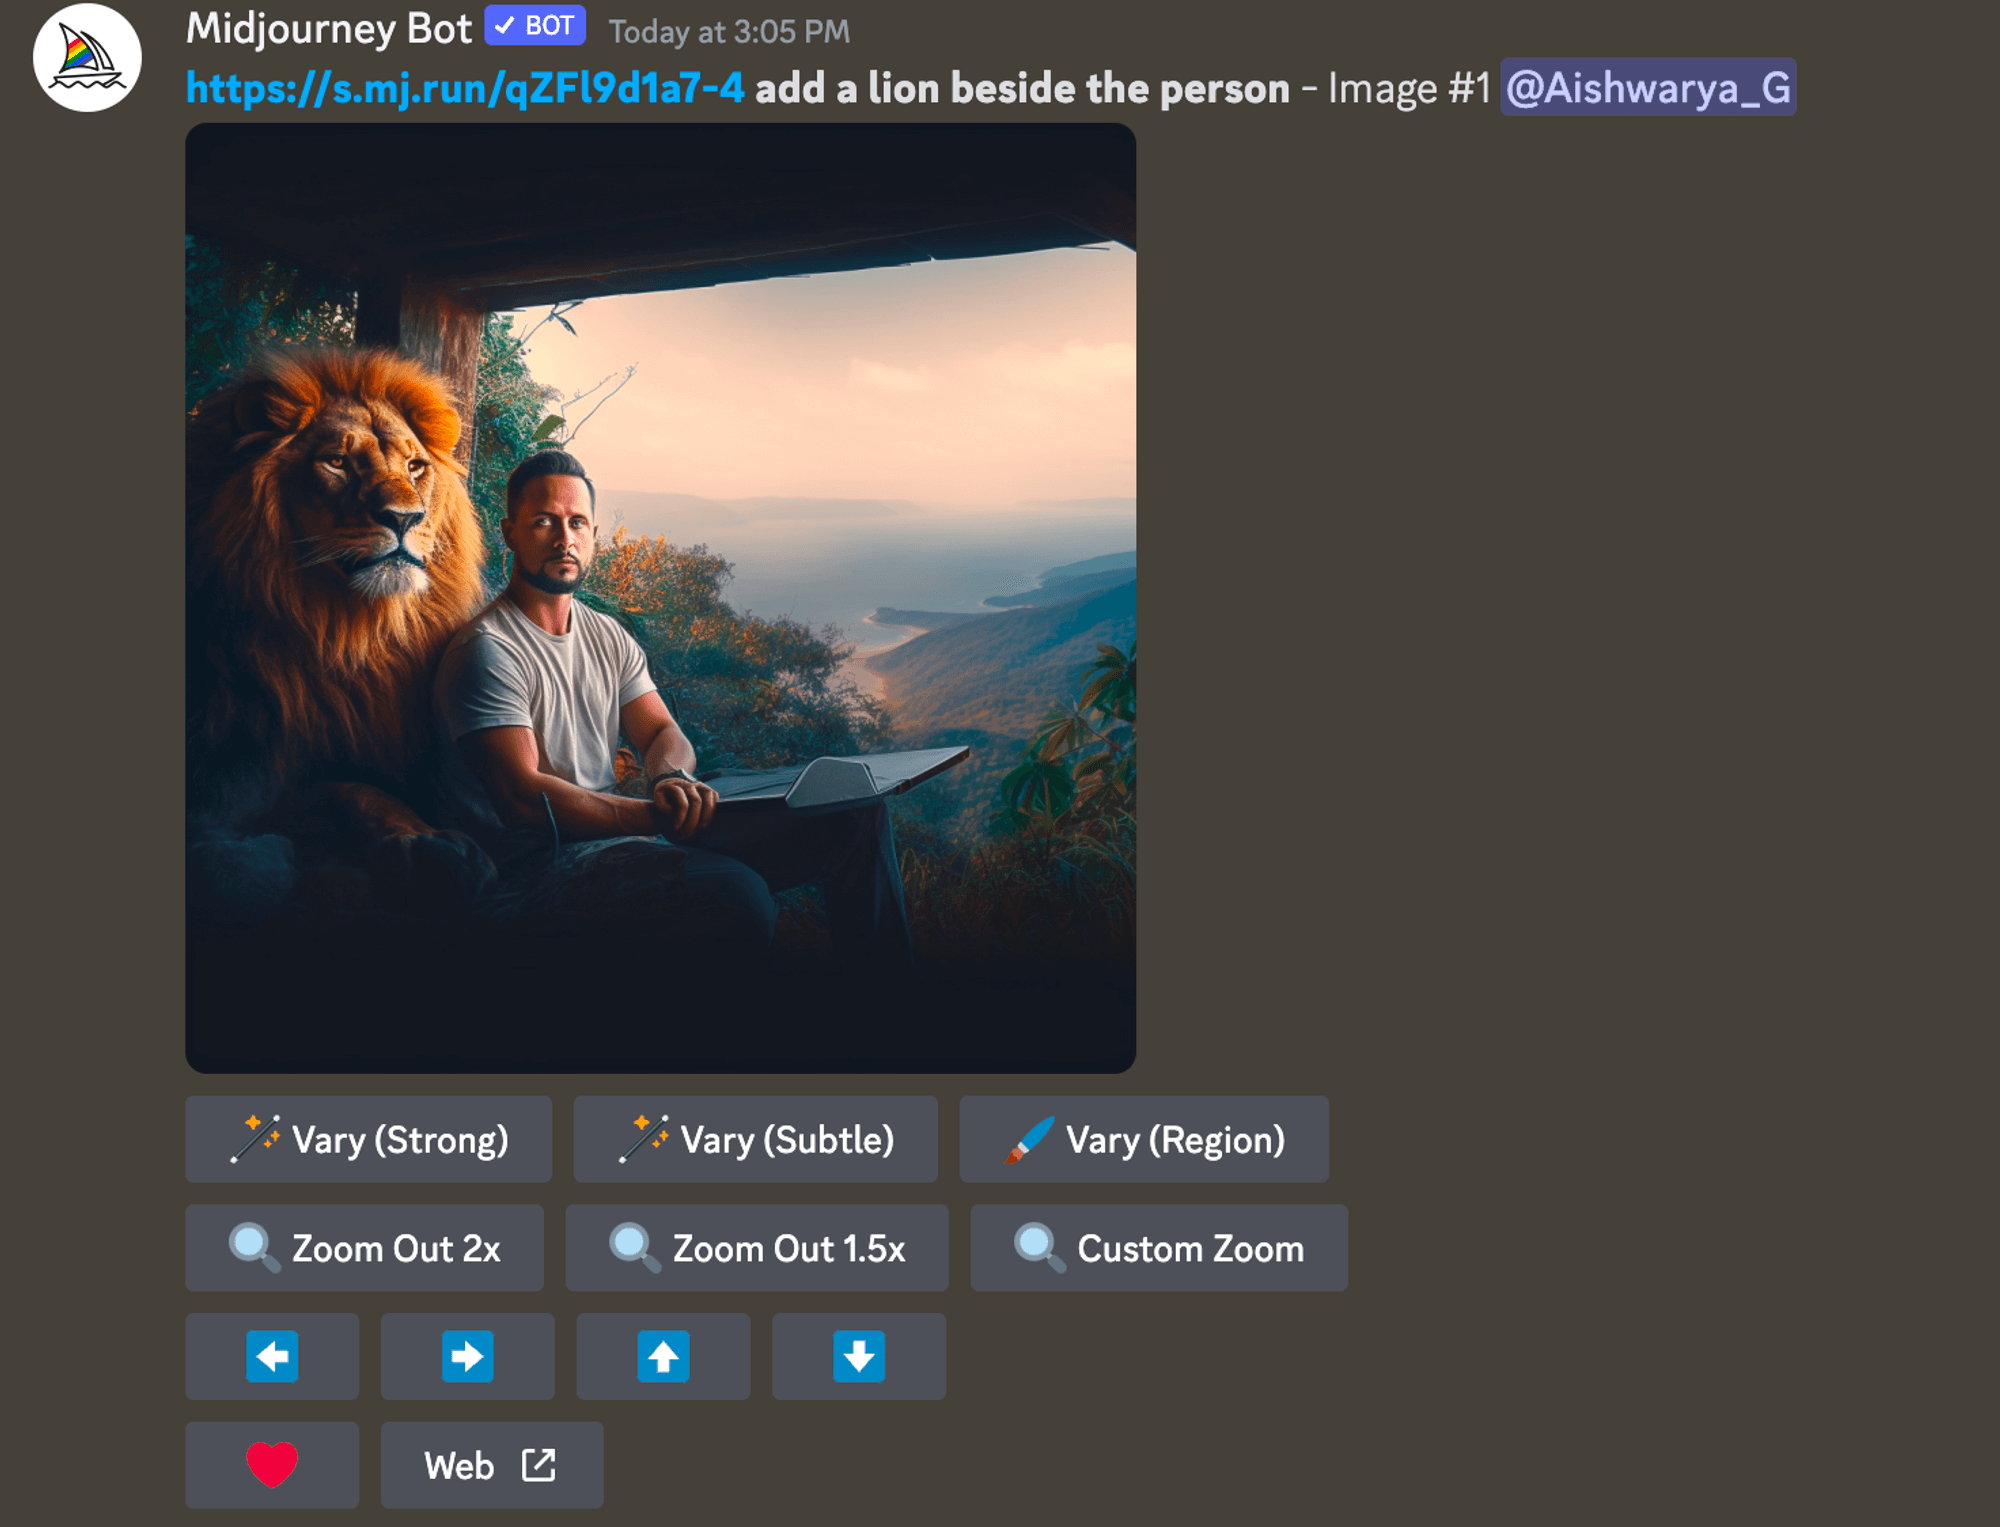
- Re-run or Re-roll: The 🔄 button would re-run the original prompt and generate a new grid with new images.
- Upscale: In the earlier versions of Midjourney, upscaling is used to increase the size and quality of the image. But with the latest versions, Midjourney generates high-quality images at their maximum size by default.
The ‘U’ button is now used to select a single image from the grid – easy to save and access additional editing tools.
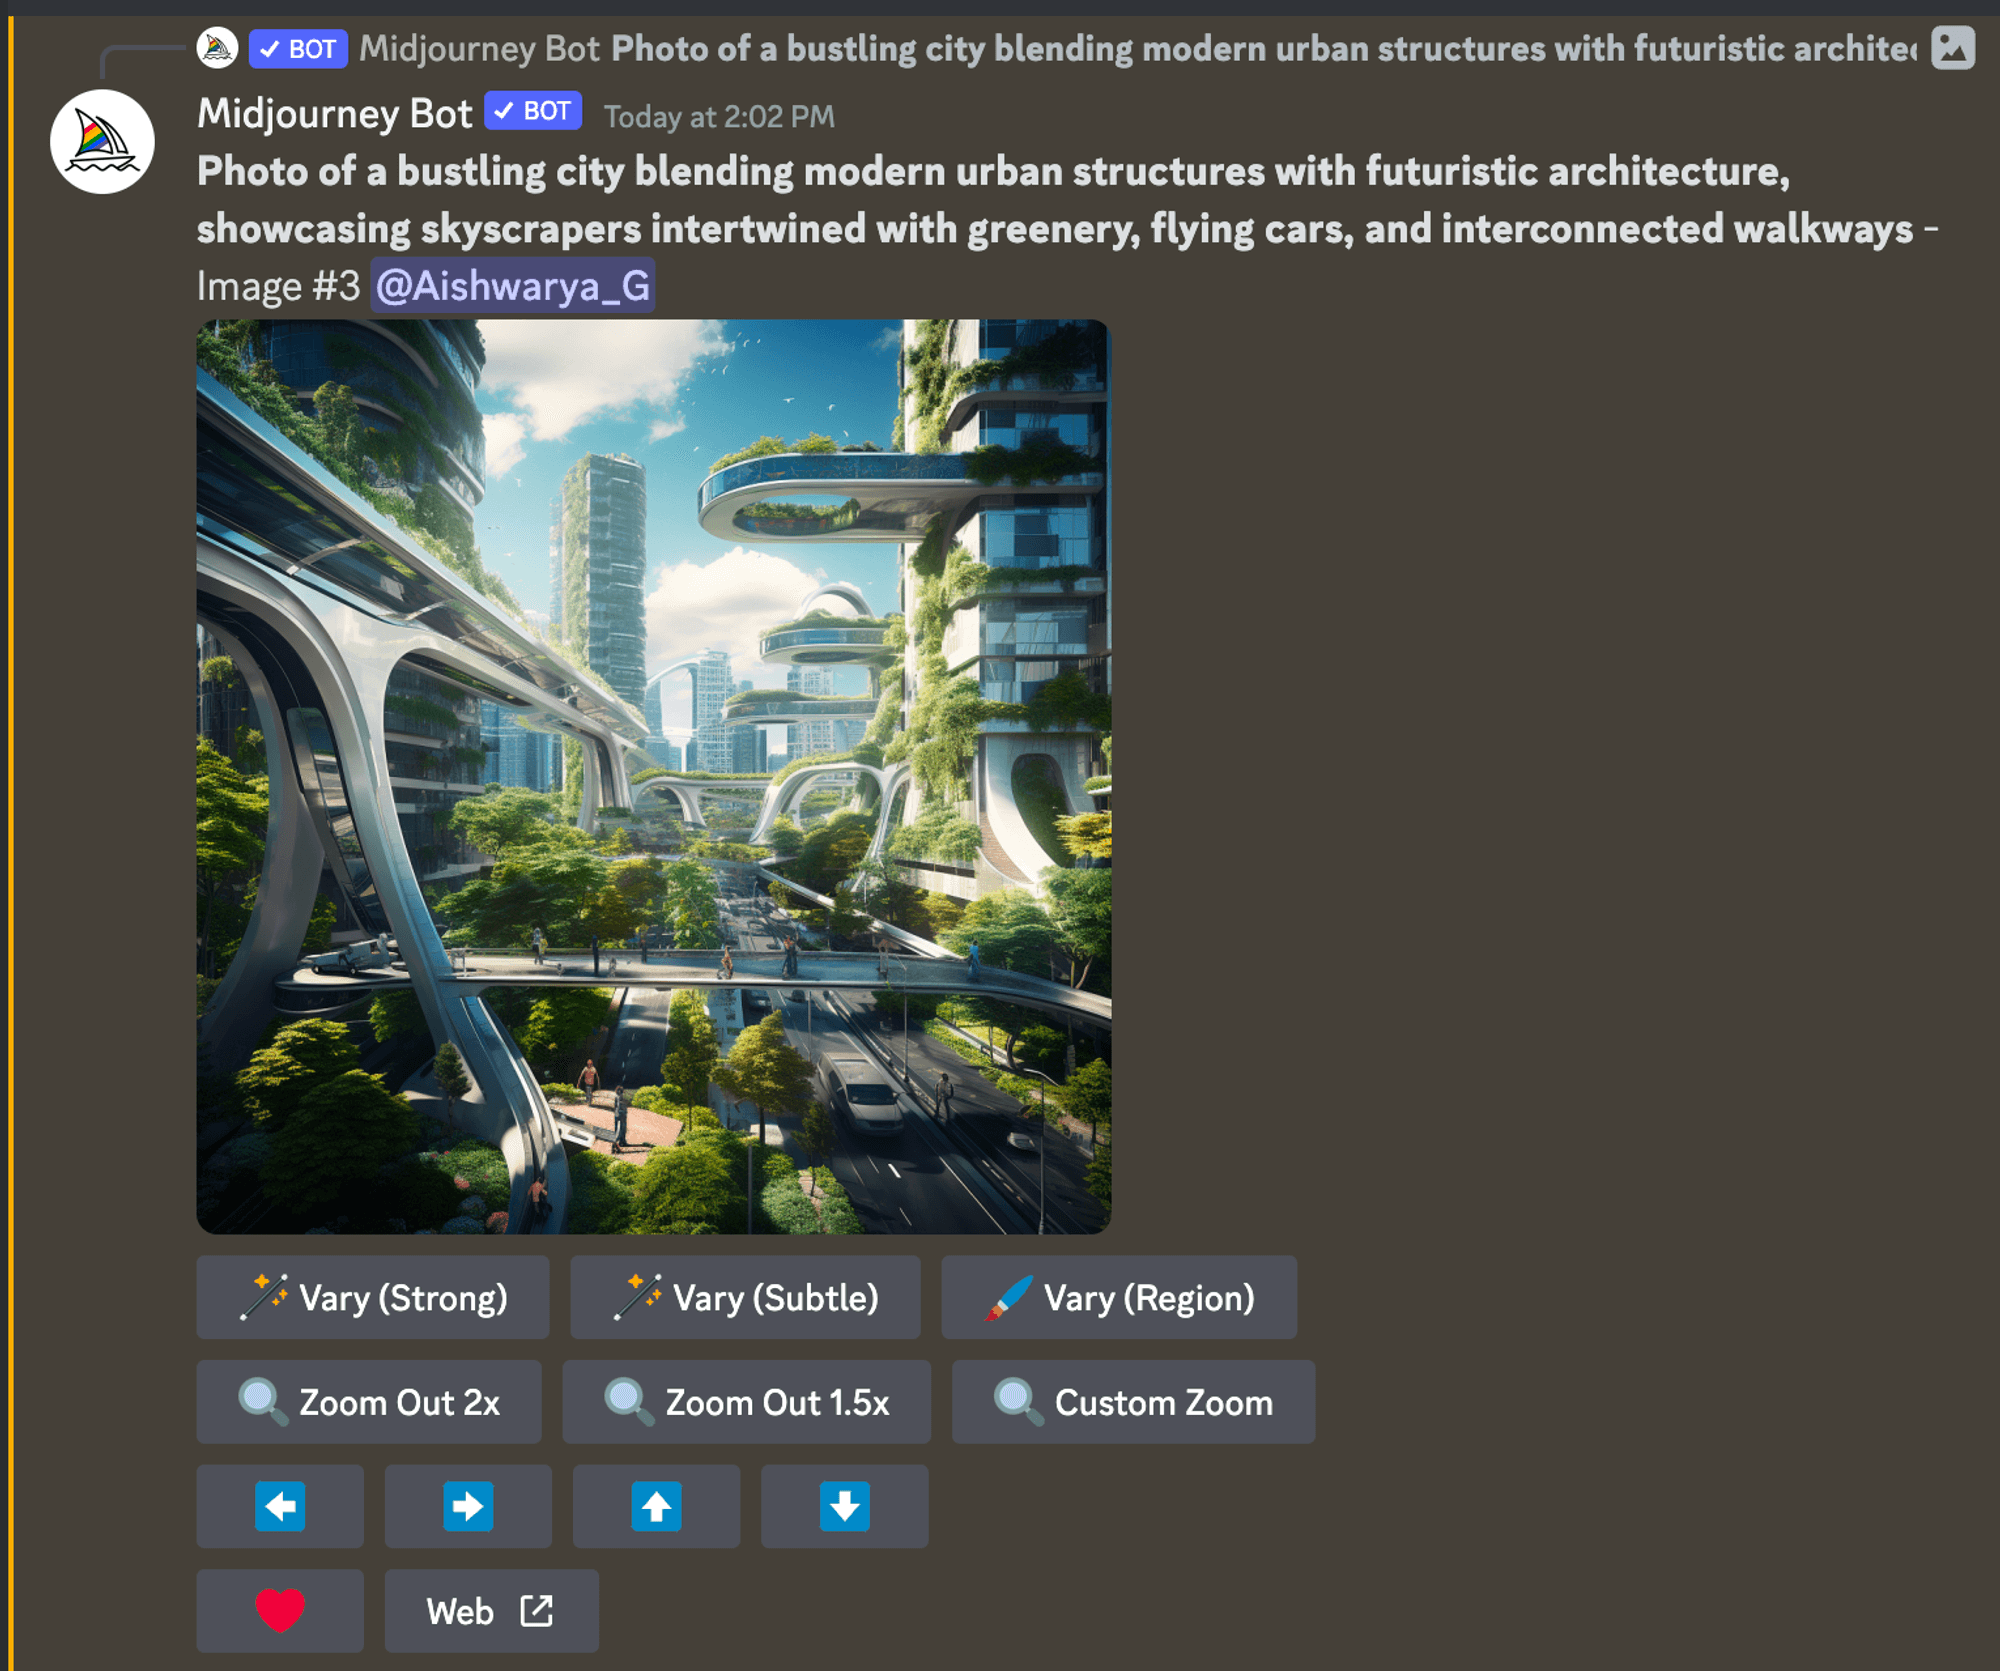
When I click on U3, it selects the third image and gives me access to editing features like zoom, vary, and more.
- Vary: The V buttons allow you to come up with different versions of your chosen image. Every time you press one, it gives you a new set of images that keep the overall look and composition of the selected image.
Once you choose an image, you can choose to create variations of the image in a strong or subtle sense.
Vary (strong) will give flexibility to Midjourney, where it experiments more.
Vary (subtle) will give more control to the user and limit the tool’s creativity.
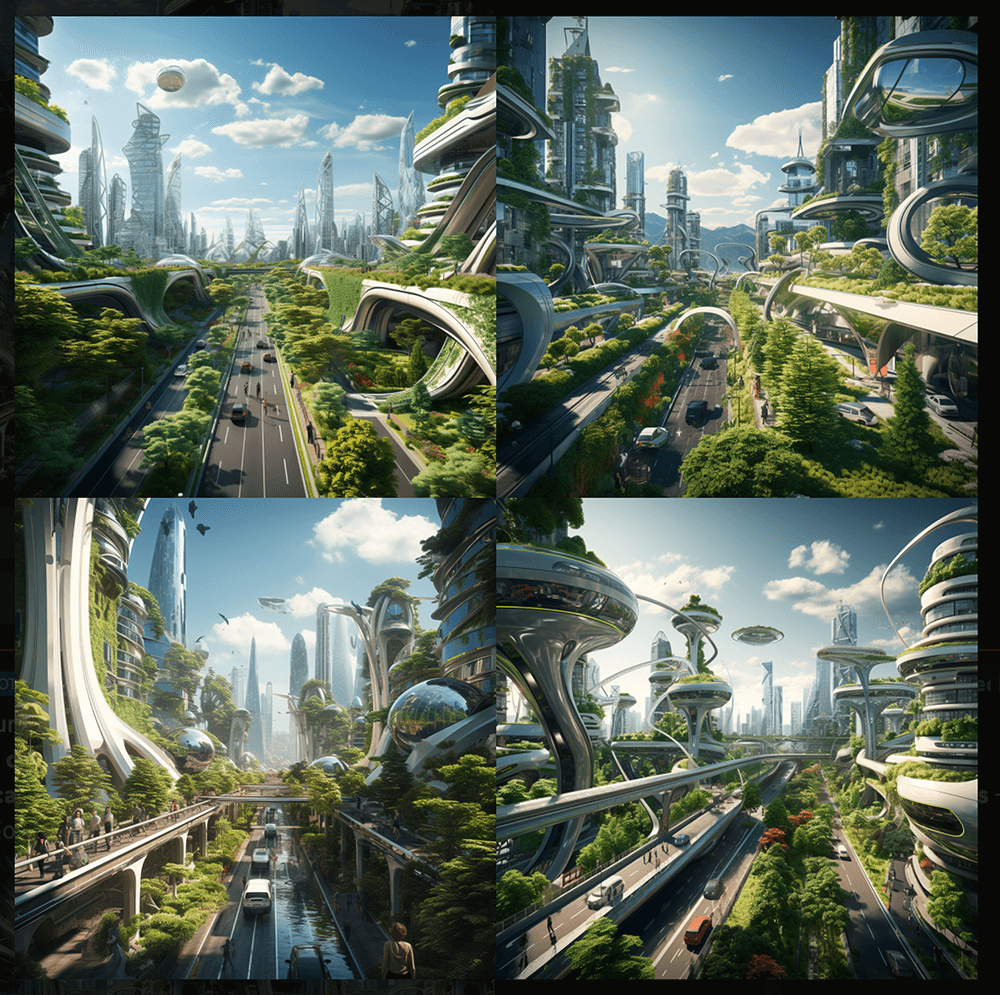
Vary (region) gives full control to the user, where you can select a part of the image to be changed.
And the results look something like this. In none of the images, you can see a skyscraper in the middle.
- Zoom out: It enlarges the view of the image, expanding beyond its initial canvas boundaries without changing the original content. The newly broadened canvas will be generated from the prompt and the initial image.
Two zoom-out options are available: Zoom out (1.5x) and Zoom out (2x), indicating the degree to which you can enlarge the view.
- Custom zoom: It lets you expand an image’s canvas between 1.0 to 2.0 scales and adjust prompts to redesign the zoomed-out view.
- Pan: The
⬅️➡️⬆️⬇️buttons help you make the picture bigger in a certain direction and add more to it using the original picture and prompt.
To add the image to your favorites list, click on the ❤️ icon. Also, view the image in your gallery by clicking on Web ↗️ button.
Advanced features of Midjourney
Along with creating AI images, Midjourney has advanced features where you can edit and customize the generated AI images.
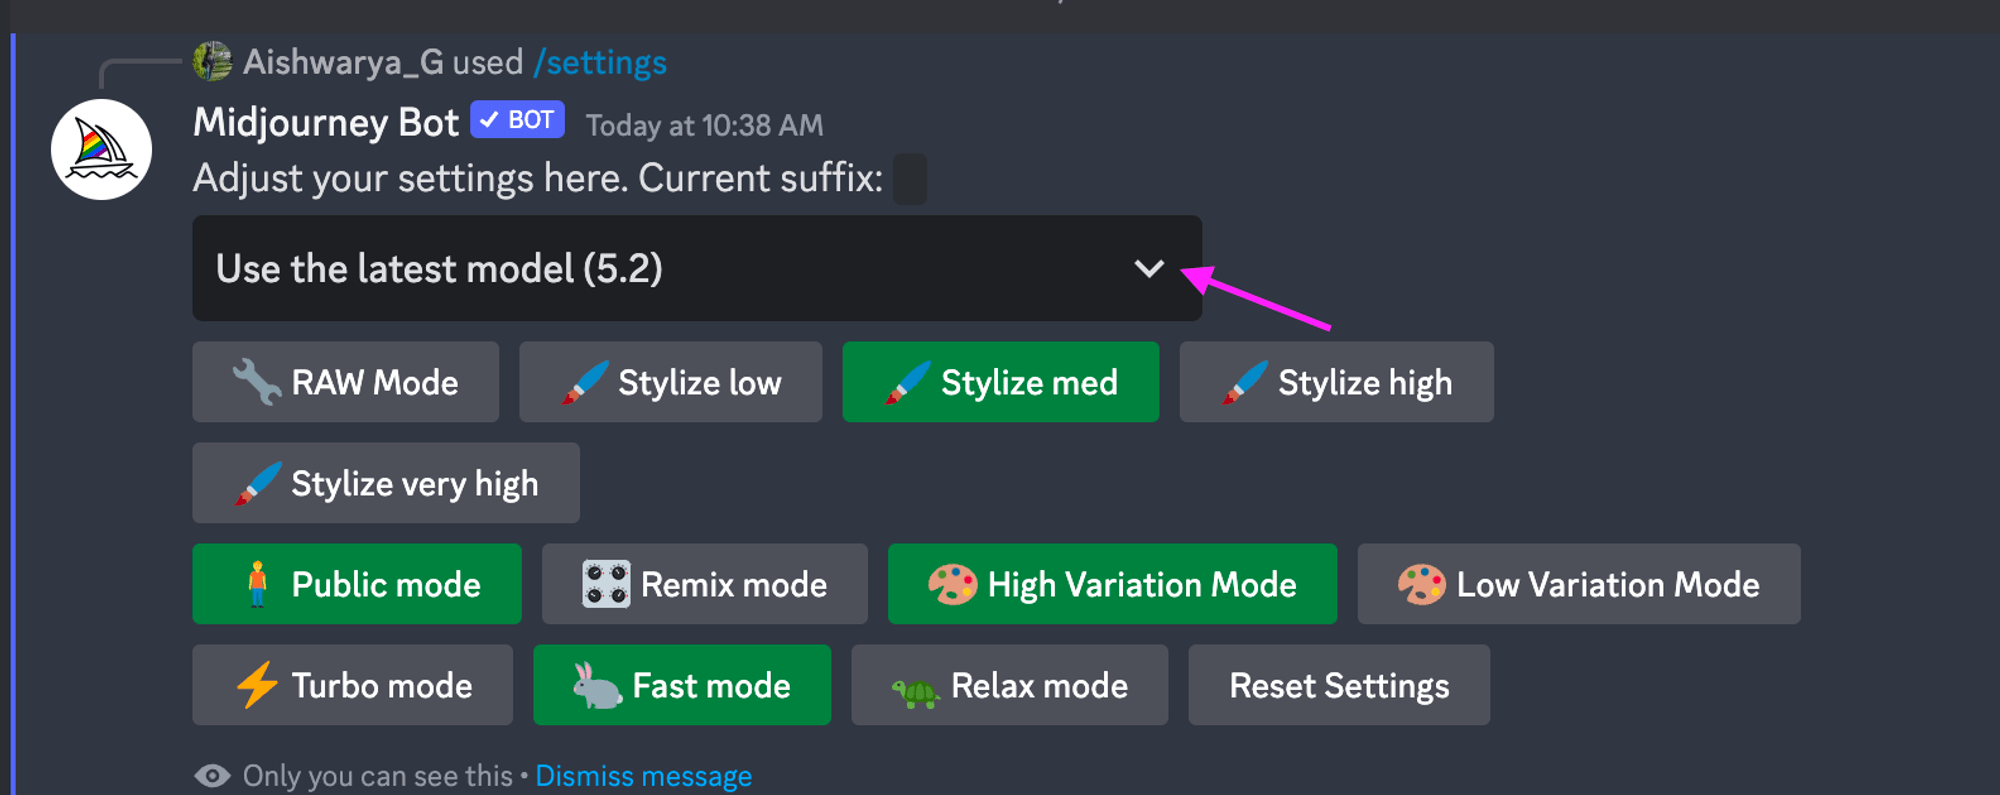
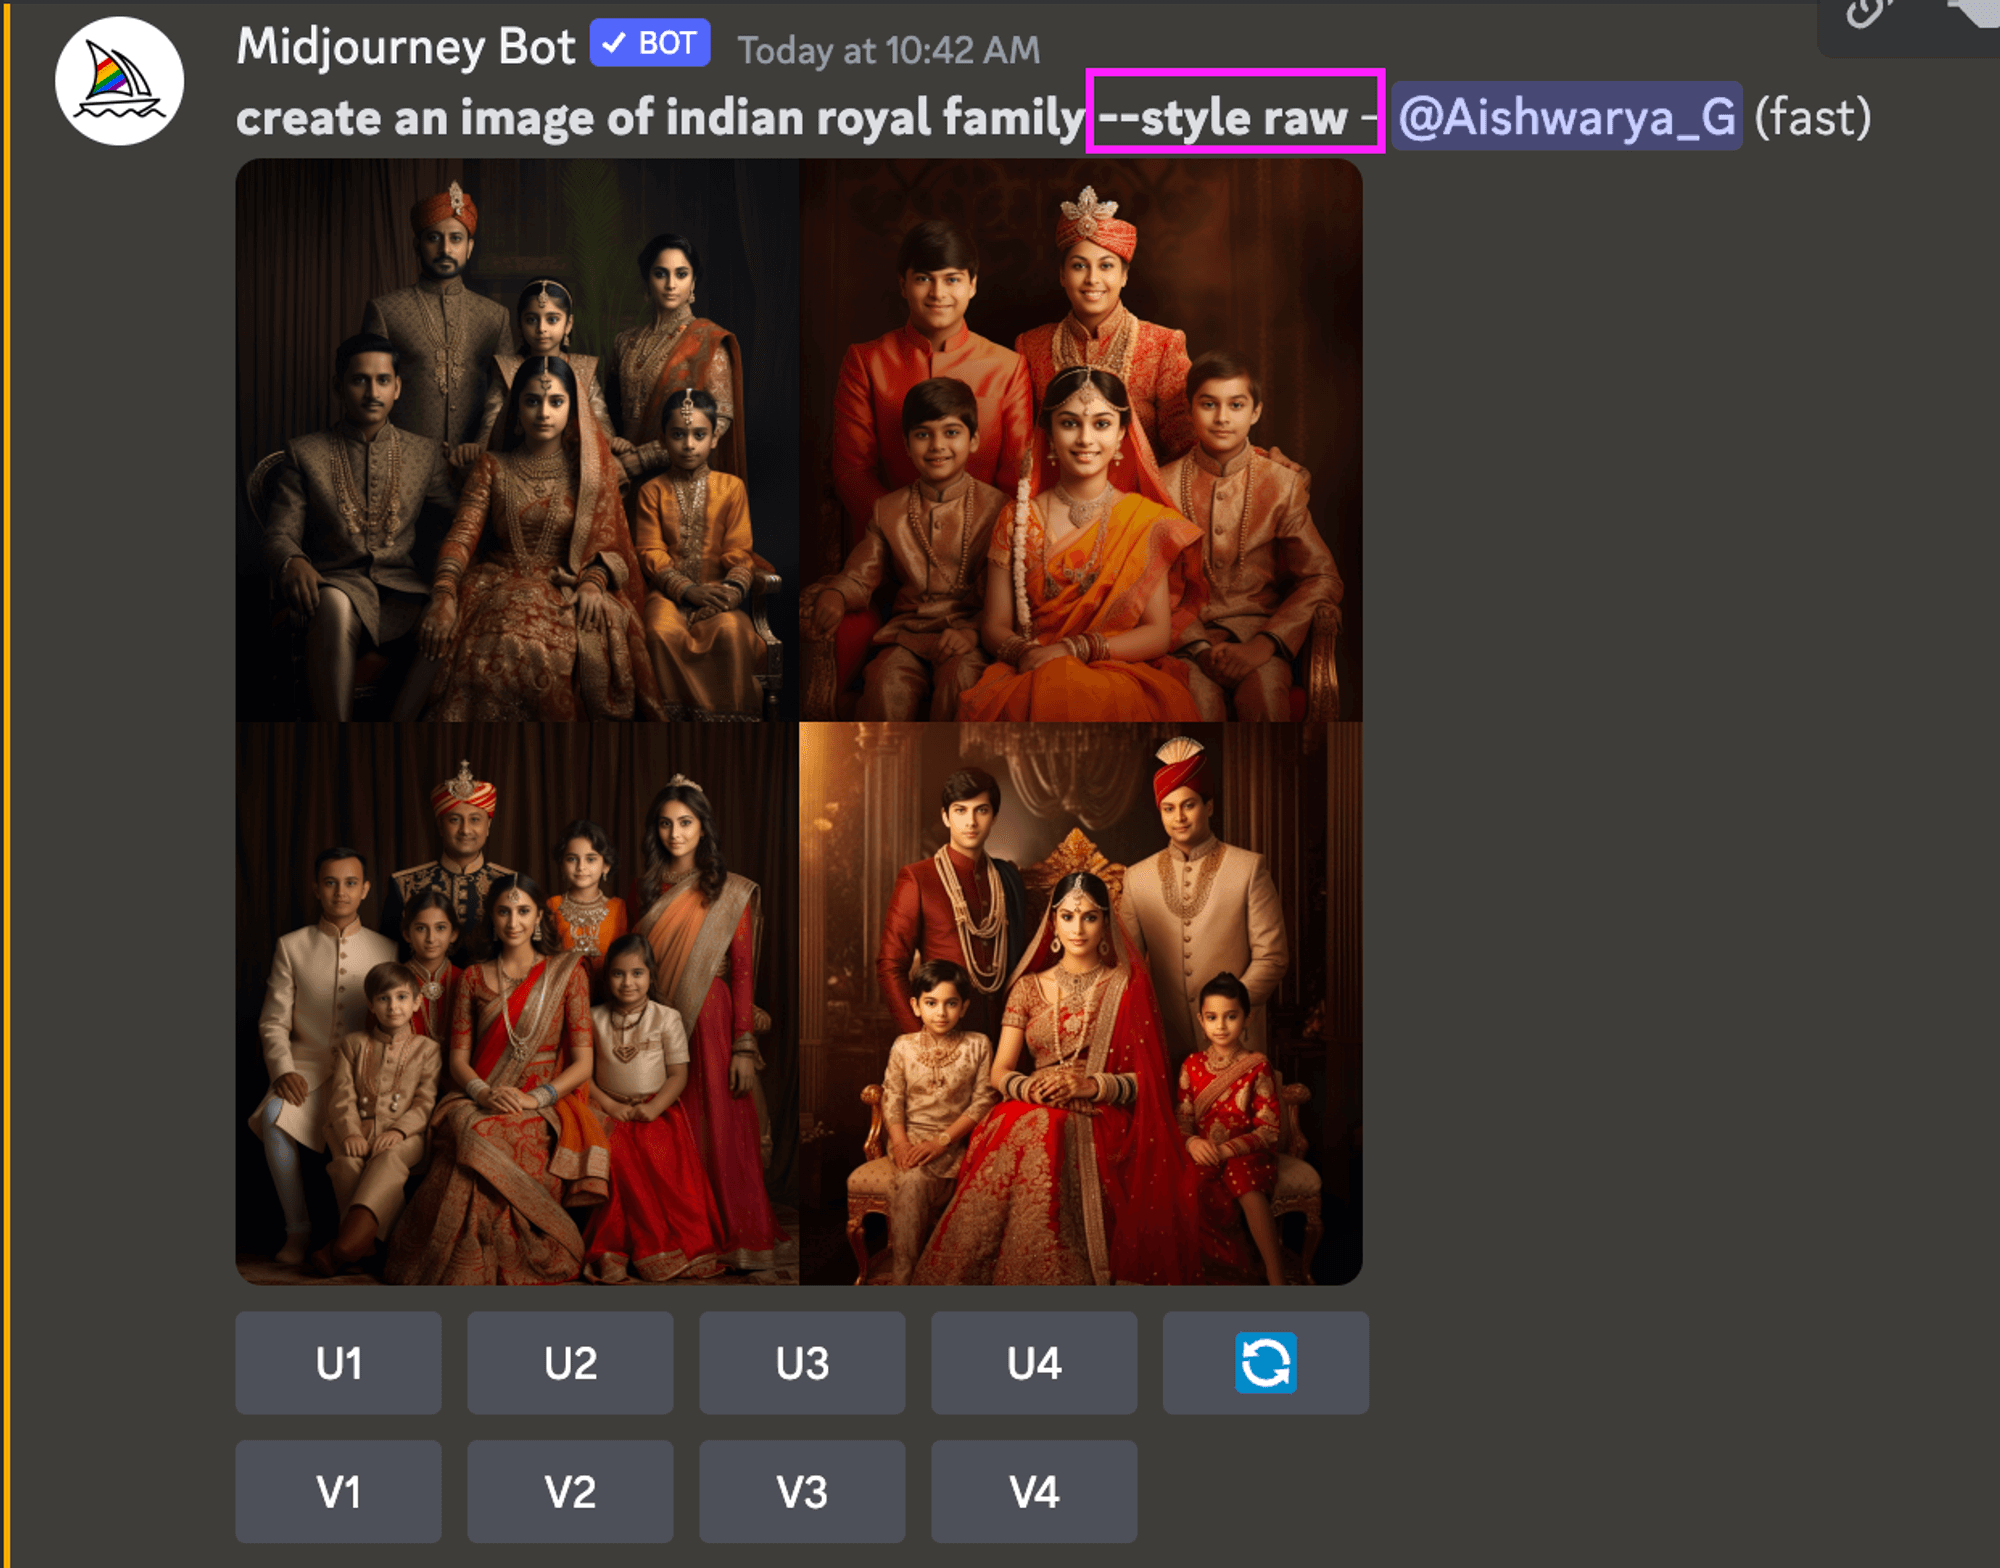
RAW mode: This feature lets you create images with a less pronounced Midjourney style, resulting in a more natural look. To use RAW mode, first, type /settings and check if you use the latest midjourney version.
Then, when entering your prompt, add --style raw.
Stylize options: Midjourney gives you more control over the image generation process with stylize options – low, med, and high.
They are parameters you can add to your prompt. Here’s a guide on how to use them: — Using the aspect ratio parameter, you can determine the shape of your image. For a square image, use --ar 1:1. — Midjourney continually updates its system for better image results. If you want to use a specific version, the --model parameter allows you to select it. For example, --model V5.2 will utilize version 5.2.
There are additional parameters like --seed, --size, and --style to further refine your image. To use the stylize options, add your chosen parameters to the prompt and proceed with image generation.
- Image generation speed: Midjourney offers an image generation speed feature, which lets you decide how quickly you want your images to be created.
Three options are available:
Relaxed Mode – This is a free, unlimited option for those on the Pro plan. It might take a bit longer, but often, good things come to those who wait.
Fast Mode – This is the standard setting. If you want to switch to fast mode no matter what you’re set to, use the --fast command.
Turbo Mode – If you need an image super quick, turbo mode is your go-to. It’s about 4x faster but does come at 2x the price.
For example, if you want an image of a black cat on a sofa using this mode, your prompt would be /imagine a black cat on a sofa --turbo
💡
Remember: The speed you pick can influence how the image turns out. Going faster might mean a bit less detail while taking it slow can offer better quality. It’s worth trying out different speeds to see what works best for your project.
- Public/ Stealth mode: Midjourney typically shows all generated images on its website, even those from private Discord servers or direct messages. However, Pro Plan subscribers can use Stealth Mode to hide their images from the Midjourney website.
To activate Stealth Mode, type the command /stealth. The images from public Discord channels are always visible. Stealth Mode is exclusive to Pro Plan subscribers.
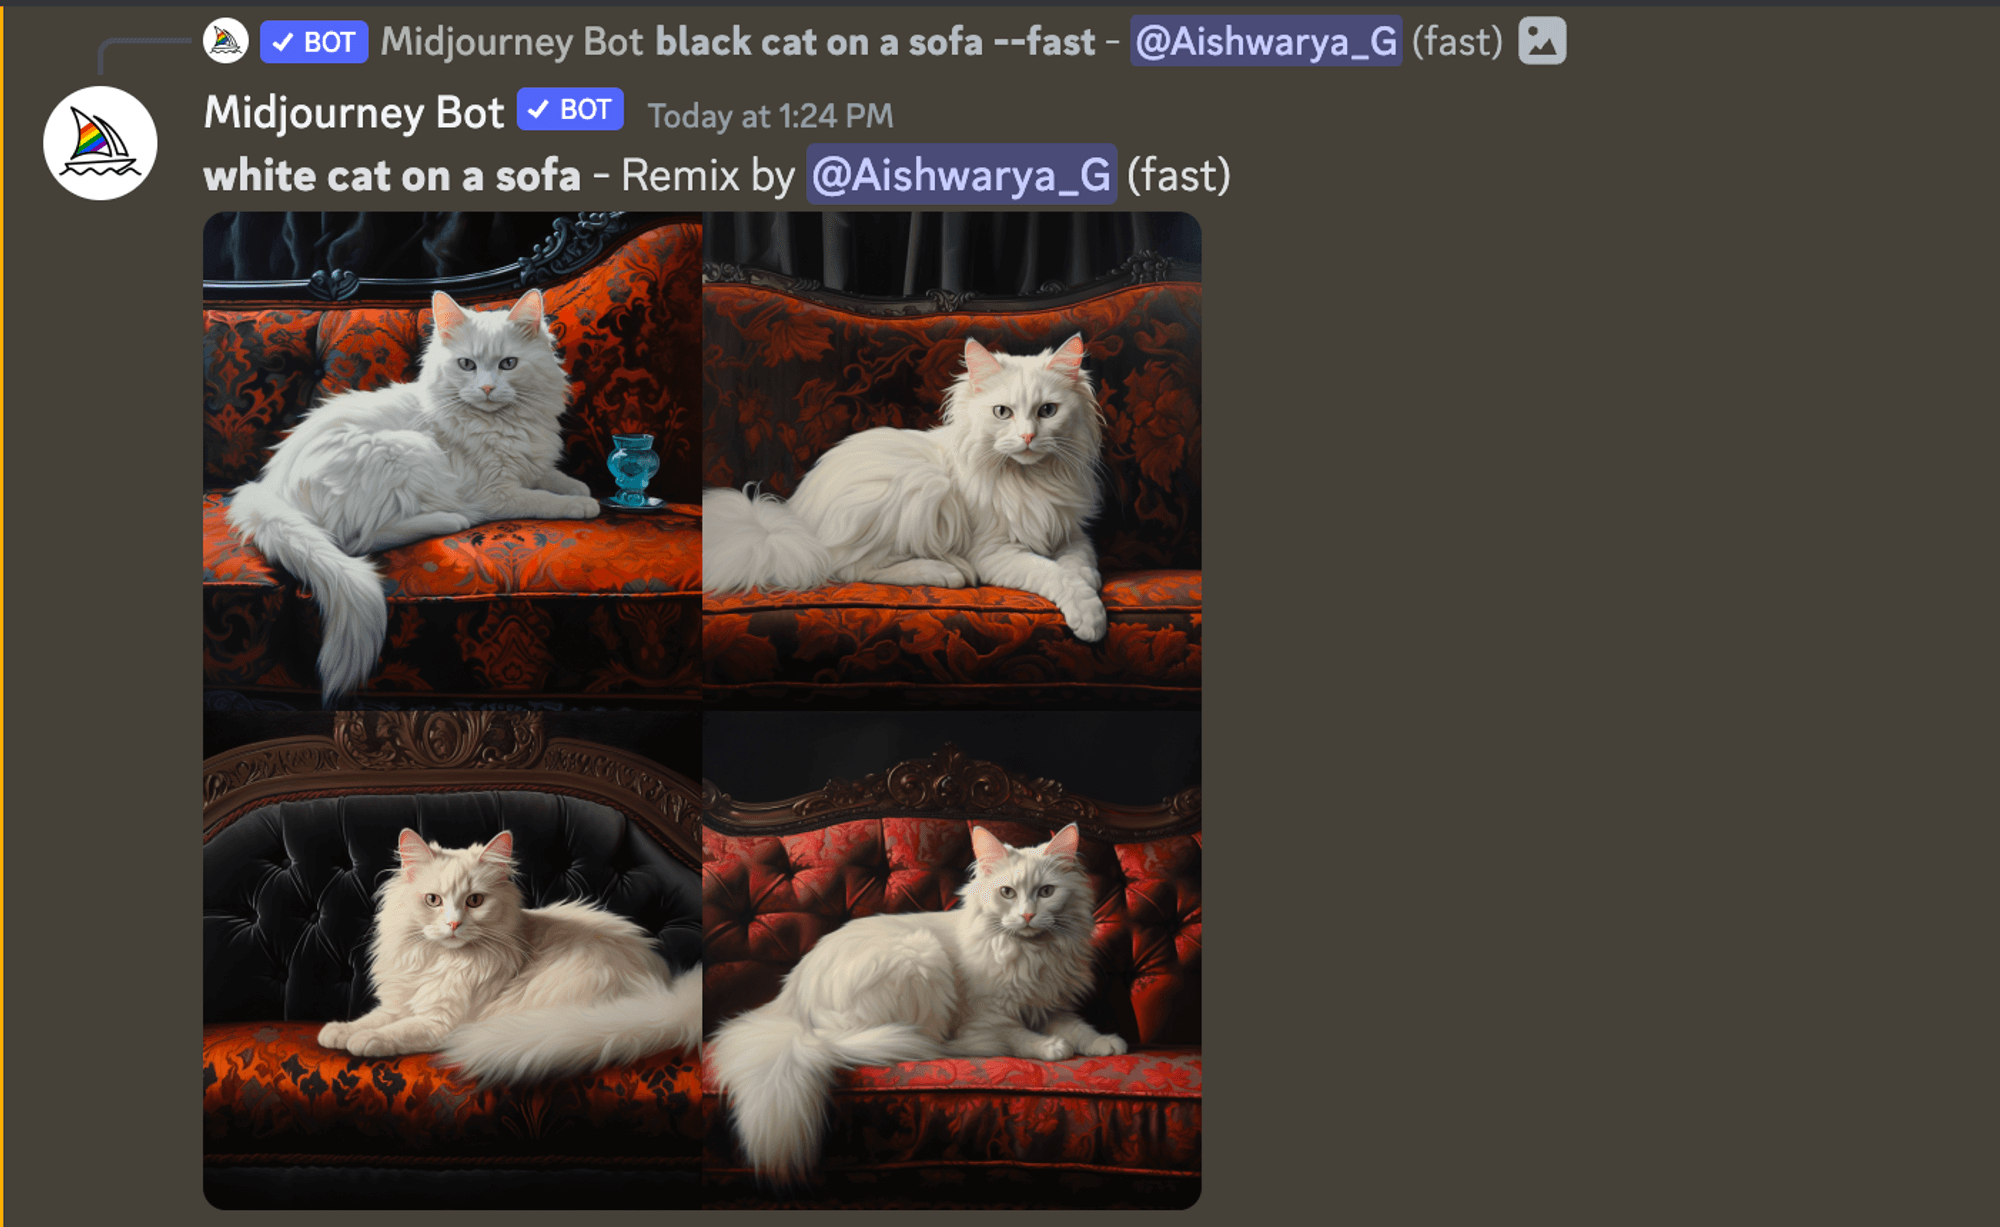
- Remix: By using this feature, you can adjust the general composition of your image.
To use this feature, enable the remix mode from /settings. Now, change the existing prompts. Now click on the vary button to remix the prompt.
And here is the result of the remix attempt.
8 tips to write effective midjourney prompts
To get the best AI images from Midjourney, it is important to master writing prompts. We have curated a list of effective tips that can help you.
1. Be Specific: Being specific in writing Midjourney prompts means providing clear, unambiguous details that guide the AI towards generating the exact image you have in mind. It removes guesswork and increases the chances of getting the desired image in one go.
For example, instead of saying, Generate an image of a dog, you can say Generate an image of a Golden Retriever puppy playing with a blue ball in a grassy park during daytime.
2. Add details but don’t over describe: Provide enough information for clarity and avoid redundancy or unnecessary intricacies that does not add to the output.
Here is an example of a over described prompt – Generate an image of a cat with green eyes, white fur with a single black spot on its right leg, sitting on a vintage wooden chair with intricate carvings, placed beside a tall window with white curtains that have blue floral patterns, during a rainy afternoon where you can see droplets on the window.
And a perfect prompt with enough details – Generate an image of a white cat with green eyes and a black spot on its leg, sitting on a wooden chair by a rainy window.
3. Experiment: Use different approaches, styles, or details to explore the range of outputs the AI can produce. It’s about being open to diverse results, learning from them, and refining your prompts based on those learnings.
For example, you can try prompts like
- Generate a forest silhouette against a pastel dawn
- Show a forest’s reflection on a still lake at dawn
- Illustrate a dawn where the forest trees cast long shadows
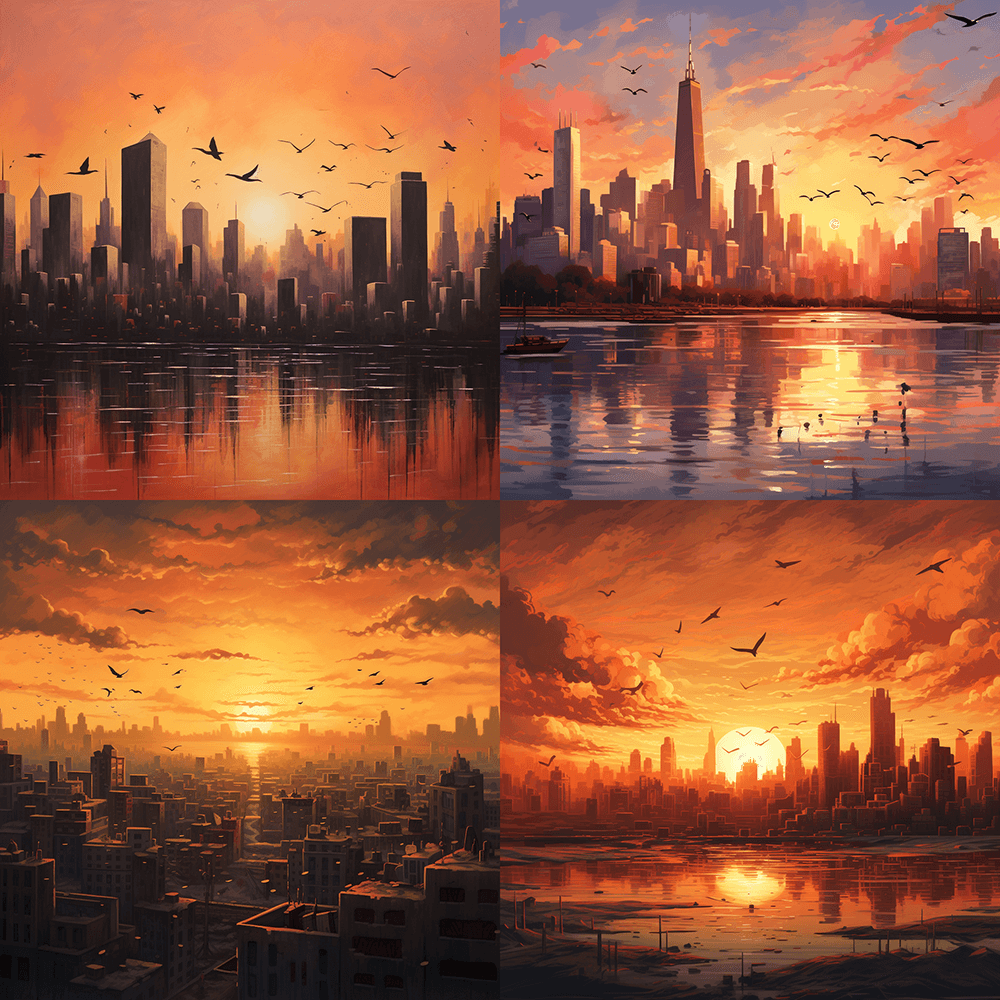
4. Add weight to prompts: Using :: in Midjourney essentially means emphasizing or prioritizing certain aspects of the prompt to guide the AI’s focus more strongly towards those details.
For example, in the prompt city skyline at sunset::2 birds::1, the sunset is given twice the importance of the birds.
5. Permutation prompts: Midjourney offer a way to produce multiple image variations using a single command. By placing options inside curly braces {} and separating them with commas, Midjourney generates different results based on those options.
For example, if you want images of birds in various colors, you can input: /imagine prompt a {red, green, yellow} bird
You can also adjust other settings using this method. Using the prompt a fox running -- ar {3:2, 1:1, 2:3, 1:2} will provide images of the fox with different aspect ratios.
This feature is only available in Fast mode. Depending on your subscription type – Basic, Standard, or Pro – you can create up to 4, 10, or 40 variations, respectively, with a single permutation prompt.
It is especially useful for those wanting to explore different image options efficiently.
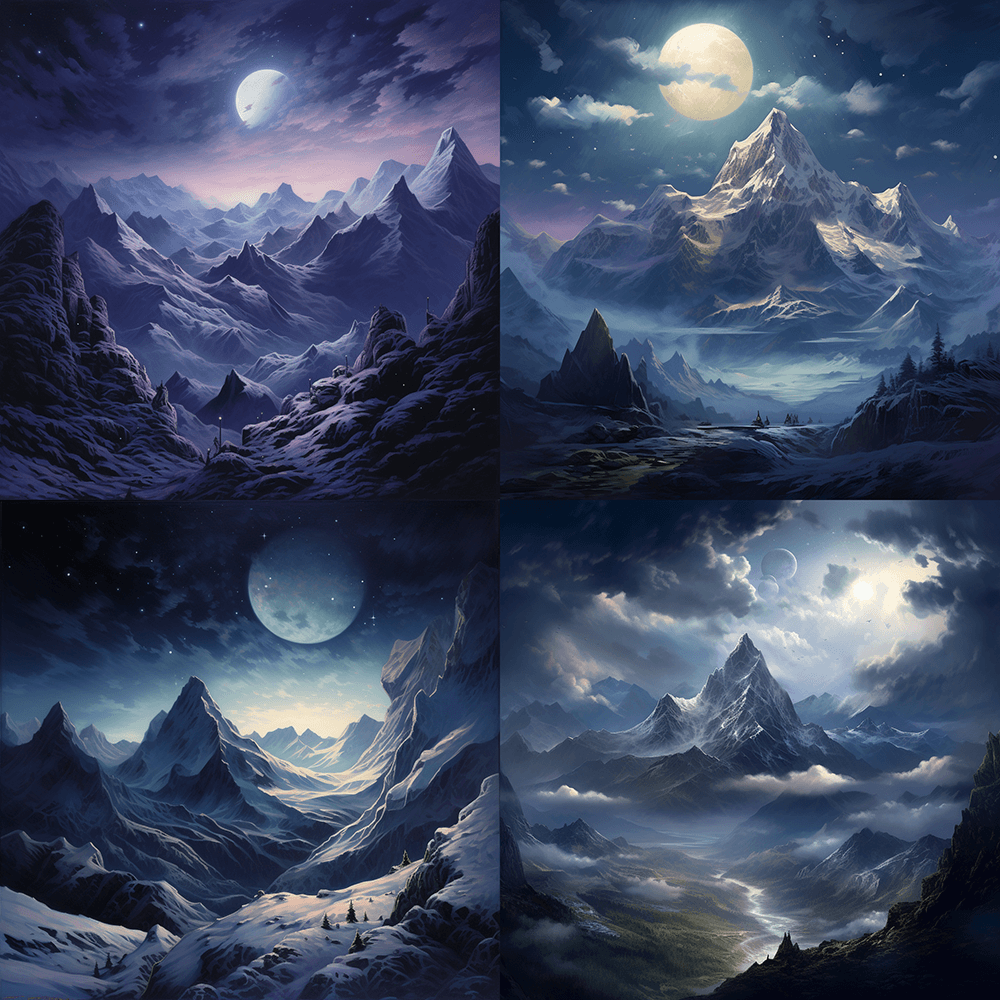
6. Use lighting: Lighting plays a pivotal role in shaping the outcome of images crafted through Midjourney prompts. Getting it right can make all the difference.
— Instead of just “forest”, specify dark sky with stars to indicate a nighttime setting. — Rather than a lengthy request, use straightforward prompts like mountaintop view under moonlight, where the peaks are bathed in a soft silvery glow— Adjust your prompts to see varied outcomes.
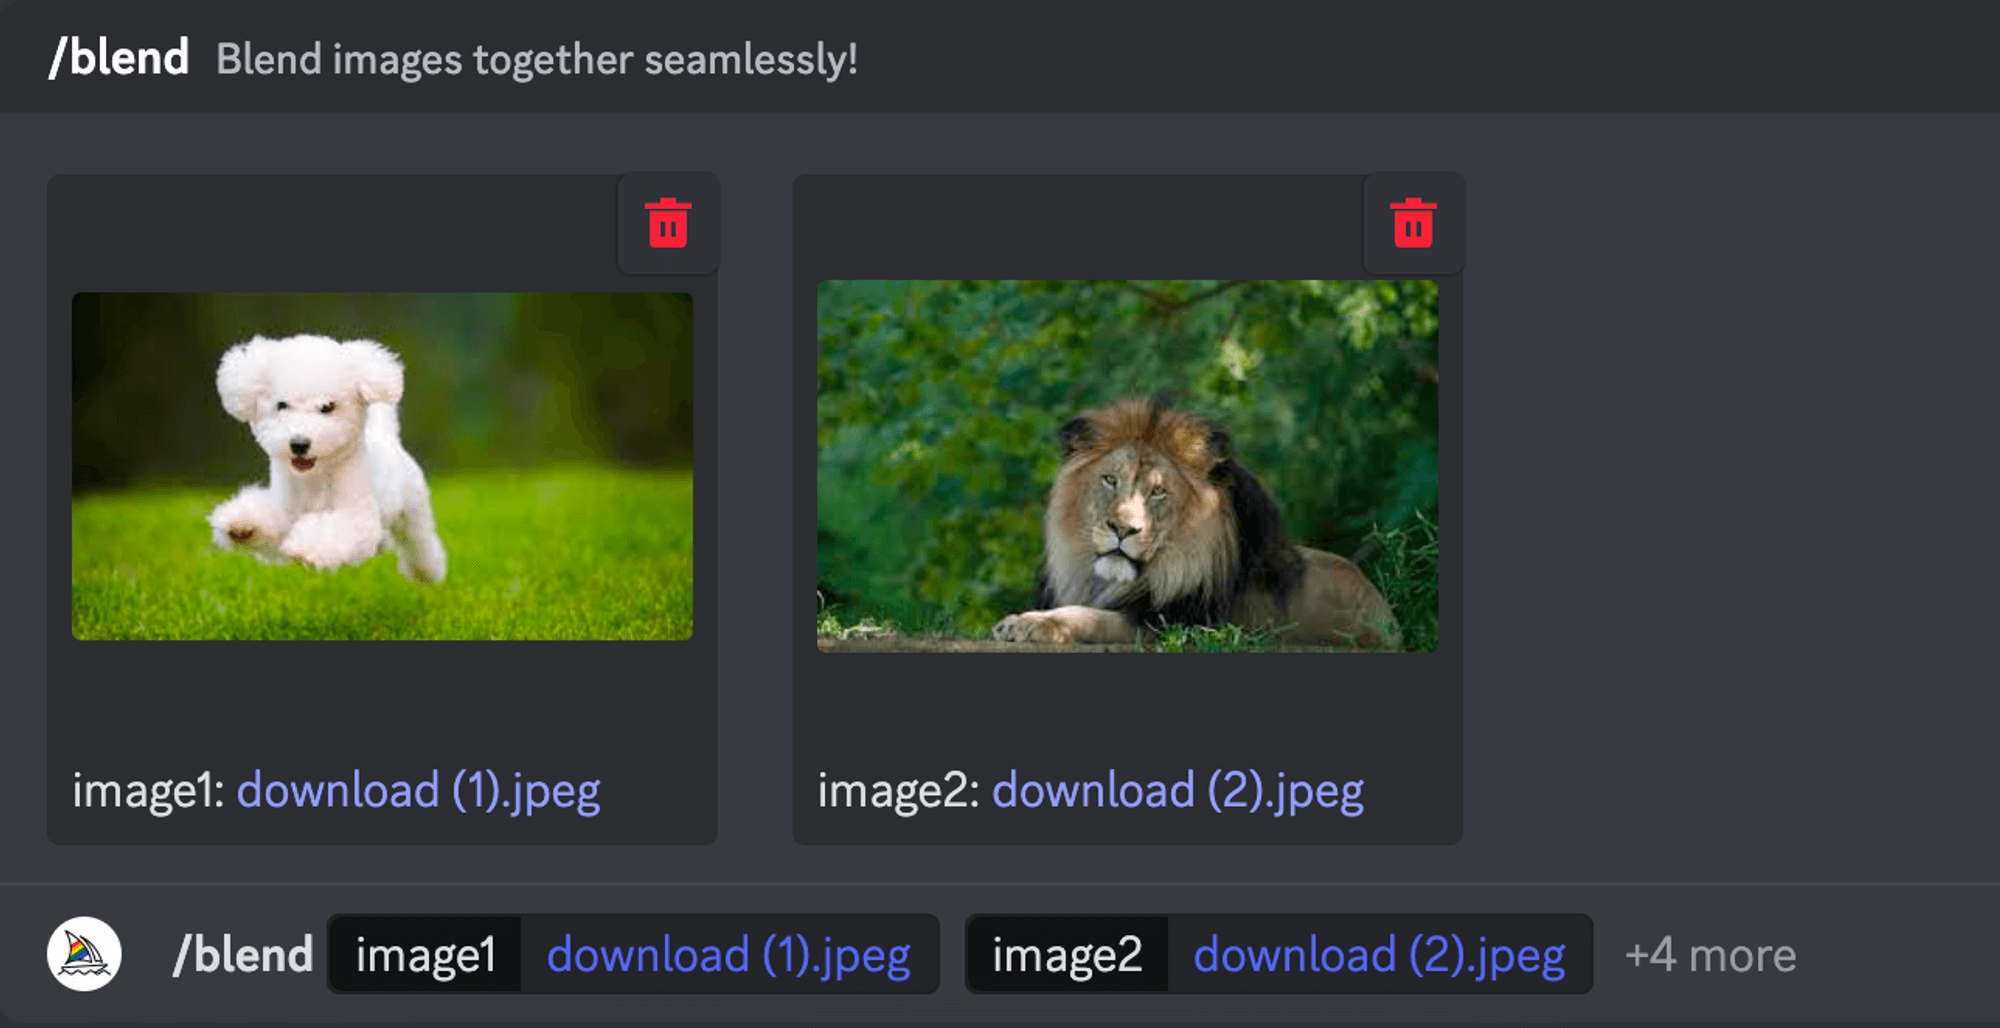
7. Explore midjourney commands: Start by familiarizing yourself with the foundational commands. Some essentials include /imagine, /help, /info, /subscribe, and /settings. But don’t stop there; dive deeper into commands like /blend, /daily_theme, /docs, /describe, and others.
You can use the blend command to merge two images and create a single interesting image.
See what Midjourney has generated 😜
8. Use images in prompts: Using images in Midjourney prompts enhances the final output. Make sure the image link ends with .png, .gif, .webp, .jpg, or .jpeg. Now, type or paste the web address of the image. Place image prompts at the start, and always pair with text or another image.
Midjourney alternative you must consider – Photosonic
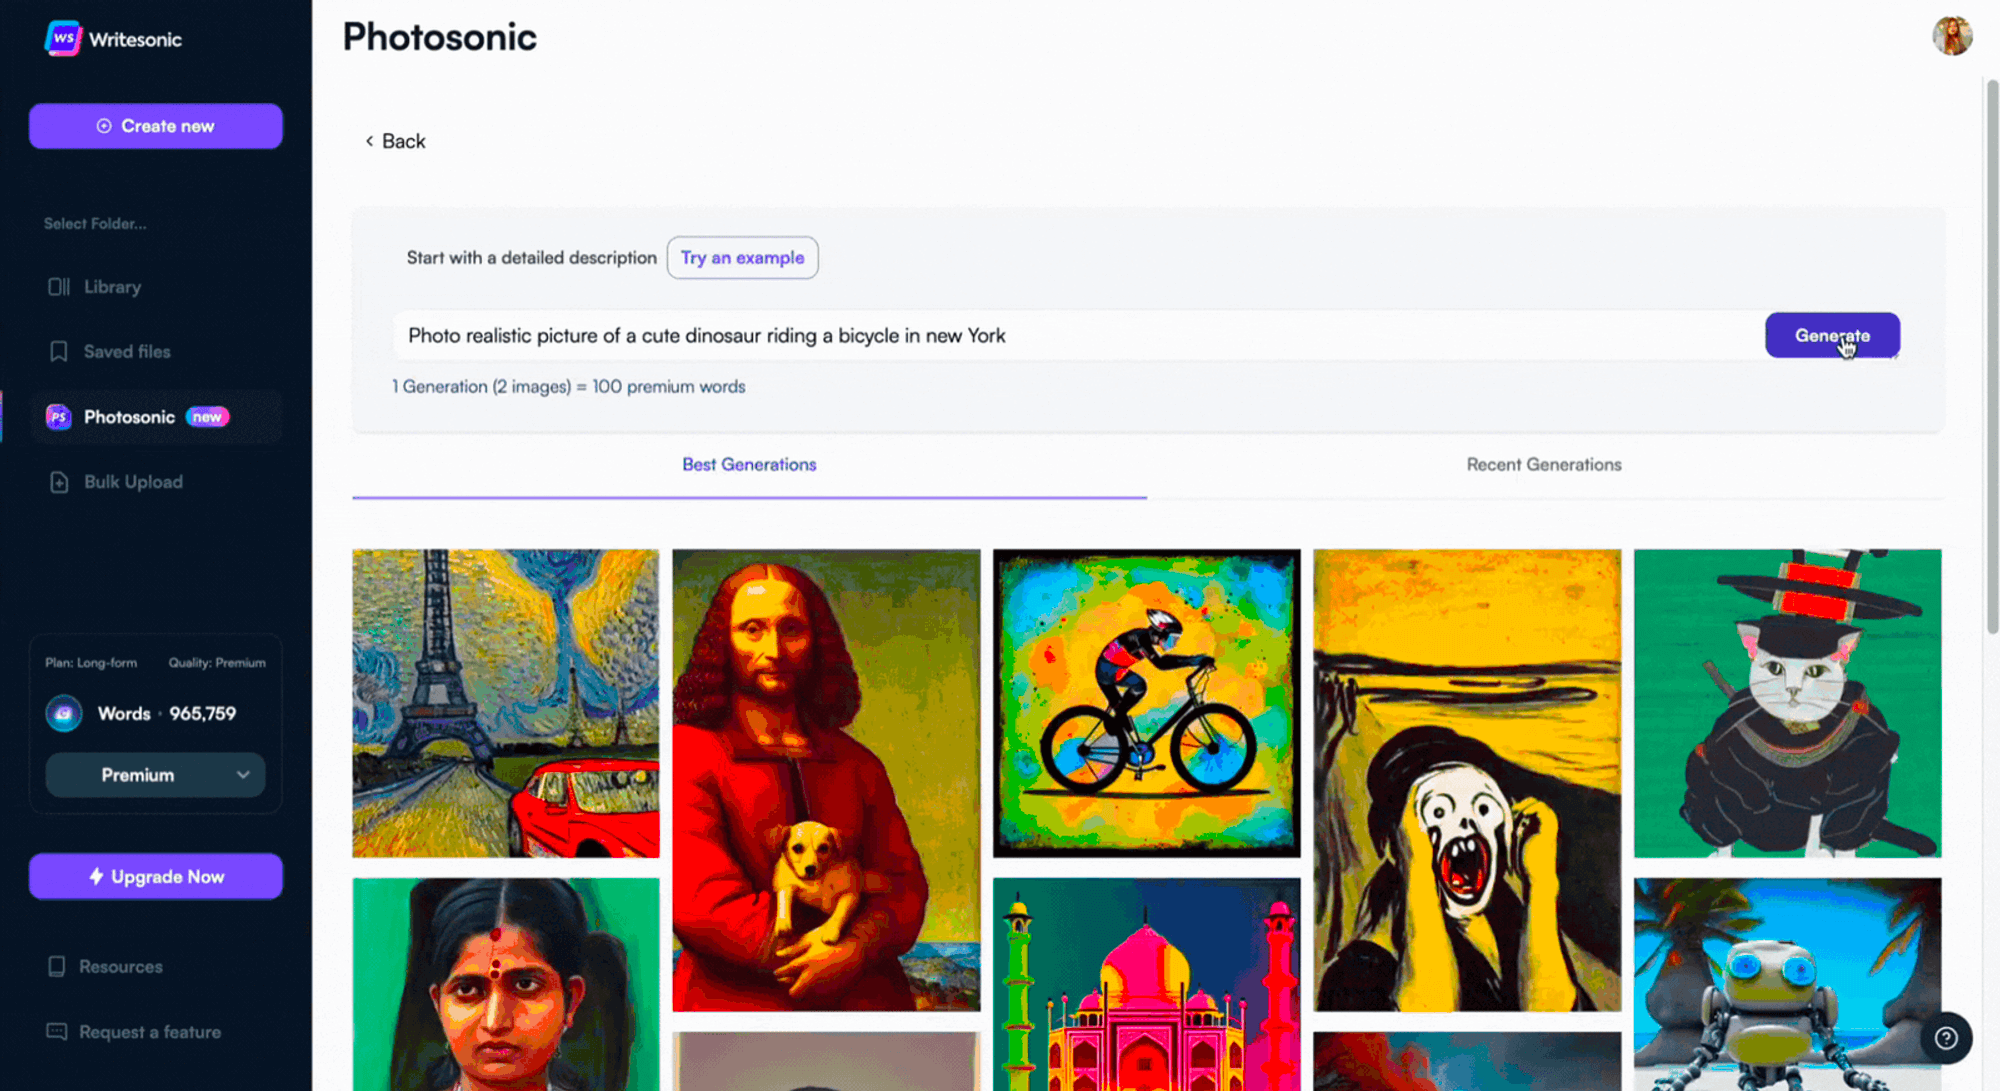
While Midjourney is a decent AI image generator, it is very complex. It can take you weeks to get a hang of how it works. If you are considering alternatives to Midjourney with a linear learning curve and the best capabilities, you must try Photosonic.
Photosonic is a part of Writesonic, an all-in-one content tool. It offers a fresh approach to AI art and image generation, allowing users to produce high-quality, unique images seamlessly.
Here is what it can do:
- Versatility in Art Generation: Whether you’re looking to produce a photorealistic image, an abstract piece, a landscape, or even a 3D rendering, Photosonic has you covered. The tool can even generate stylistic images akin to specific art movements or styles.
- Royalty-Free and Original: One standout feature is that the art generated by Photosonic is entirely unique and royalty-free. This means you can use it in any capacity without fretting about copyright issues.
- Quality and Clarity: While some AI art generators might produce unclear or low-res images, Photosonic prioritizes high-quality outputs.
- AI models: Photosonic uses stable diffusion and DALL.E models to get the best of both worlds.
- Ease of use: Upon all this, Photosonic is easy to use. You can generate an AI image in just 2 clicks – add a prompt and generate. No additional settings.
- Enhancing prompts: If you are not good at prompts, do not worry! Photosonic helps you enhance prompts to generate relevant AI images.
Final thoughts on Midjourney
If you are feeling overwhelmed after reading this blog, we understand! You are not the only one who thinks Midjourney is complex with its features and settings. Anyone with limited technical and editing knowledge would feel the same.
The good news is you have easy-to-use tools with similar or better features than Midjourney. And Photosonic tops this list. It is not just a standalone AI tool for image generation but comes with a package of all the AI tools and features you need to become a pro at content creation.
FAQs
1. How to use Midjourney on Discord?
To use Midjourney on Discord, you must be part of the Midjourney Discord server. Once you’ve joined, you’ll find various channels to interact with the Midjourney bot. Start by typing the command /imagine followed by your prompt to generate an image.
2. How to use Midjourney for free?
Midjourney does not offer free plans or trials to test out its capabilities. You must subscribe to a plan that starts at $10/ month to use Midjourney. But if you do not want to break the bank, consider Photosonic. It’s a free Midjourney alternative that allows you to generate 500 images. It has a range of features that can help you generate unique and captivating images.
3. How to use an image in Midjourney prompts?
When using Midjourney, you can incorporate images into your prompts for a more tailored result. Ensure the image you want to use has a direct link ending in formats like .png, .jpg, .jpeg, .gif, or .webp. Input the image’s URL at the beginning of your prompt, followed by any additional text or parameters.
4. Which is better, Dall-E or Midjourney?
Both Dall-E and Midjourney offer unique features and cater to different requirements. Dall-E, developed by OpenAI, is renowned for its ability to generate diverse and intricate images from text descriptions. On the other hand, Midjourney is designed for versatility and offers a more interactive experience, especially on platforms like Discord.
If you’re looking for an alternative that combines the best of both, Photosonic might be right up for you. As an advanced AI image generator, Photosonic delivers quality and ease of use, making it a worthy contender in the AI art generation space.
5. Can you train Midjourney on your own images?
Currently, Midjourney doesn’t provide a feature to train the AI specifically on your own images. It’s designed to interpret and generate art based on a vast dataset it’s been trained on. It might require specialized tools or platforms if you want AI tailored to your specific images or style. However, for most users, the diverse range of images Midjourney produces is more than sufficient.













![Generative Engine Optimization (GEO) & How to Actually Do It [2025]](/wp-content/uploads/7.1.png)



![21 Practical Ways to Use AI [Examples + Tools]](/wp-content/uploads/How-to-use-AI-scaled.jpg)

![140 Best AI Tools: Rated & Reviewed [2025]](/wp-content/uploads/Best-AI-Marketing-Tools-1-1.jpg)

